Why Managed Hosting for Open-Source Apps Makes Sense
If you have managed Linux servers before, you probably know how self-hosting usually starts. You find a useful open-source application such as Nextcloud for file storage or Immich for photos, rent a small VPS, create a Docker Compose setup, and place Nginx and Let’s Encrypt in front of it.
That setup may work perfectly at first, but every new application adds more things to maintain. You still have the operating system, container images, databases, reverse proxy configuration, SSL certificates, and backups to keep up to date. Over time, even a few small services can turn into regular maintenance work.
For a larger project where you need complete control over the server, that extra work often makes sense. For a few personal, family, or team applications, however, the maintenance can easily take more time than expected. More importantly, an application that sits unpatched for several months can become a security risk when it is exposed to the public internet.
This is where PikaPods comes in. It is a managed hosting service for open-source applications operated by Peakford Ltd, the same company behind the BorgBase backup service.
Instead of setting up a VPS yourself, you choose an application from the PikaPods catalog, select how much CPU, memory, and storage it needs, and create what PikaPods calls a pod. The platform then runs the application for you while handling HTTPS, application updates, and backups in the background.
In this review, we will look at how PikaPods works, what it costs, how to create and manage a pod, and where the service has limitations. We will also show how we use it ourselves, since TecMint’s website analytics have been running on a PikaPods pod for some time.
How PikaPods Works Under the Hood
Before we create a pod, it is worth understanding what PikaPods means by a pod, because that explains both why the service is easy to use and why it does not offer the same level of control as a normal VPS.
A pod is a single instance of one application running inside its own isolated container on PikaPods’ infrastructure, with hosting available in either the EU or US region. PikaPods packages and maintains the applications in its catalog, which means it also takes care of the basic application setup, configuration, and database behind the scenes.
According to PikaPods, regular application updates are tested and applied weekly, while important security updates may be rolled out sooner. The catalog includes popular open-source applications such as Nextcloud, Immich, Paperless-ngx, FreshRSS, n8n, Actual, and Umami.
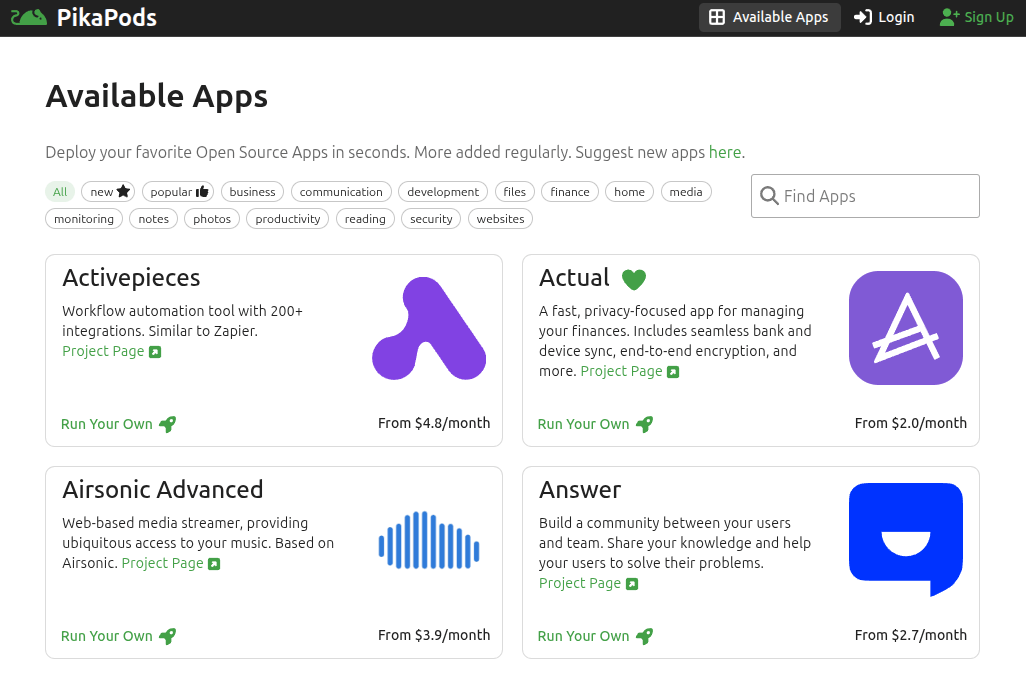
The main trade-off is that you are getting access to the application, not to the underlying server. You cannot open a shell inside the container, install additional system packages, or upload and run your own Docker image. In other words, if an application is not available in the PikaPods catalog, you cannot deploy it there yourself.
Every pod gets its own pikapod.net hostname and is available over HTTPS by default. You can also connect one custom domain if you prefer to use your own address.
From the pod settings, you get several tools for managing the application without needing direct server access. These include SFTP access to the pod’s files, database access, daily encrypted backups to your own S3-compatible storage, application logs, and an IP allowlist that can restrict who is allowed to reach the pod.
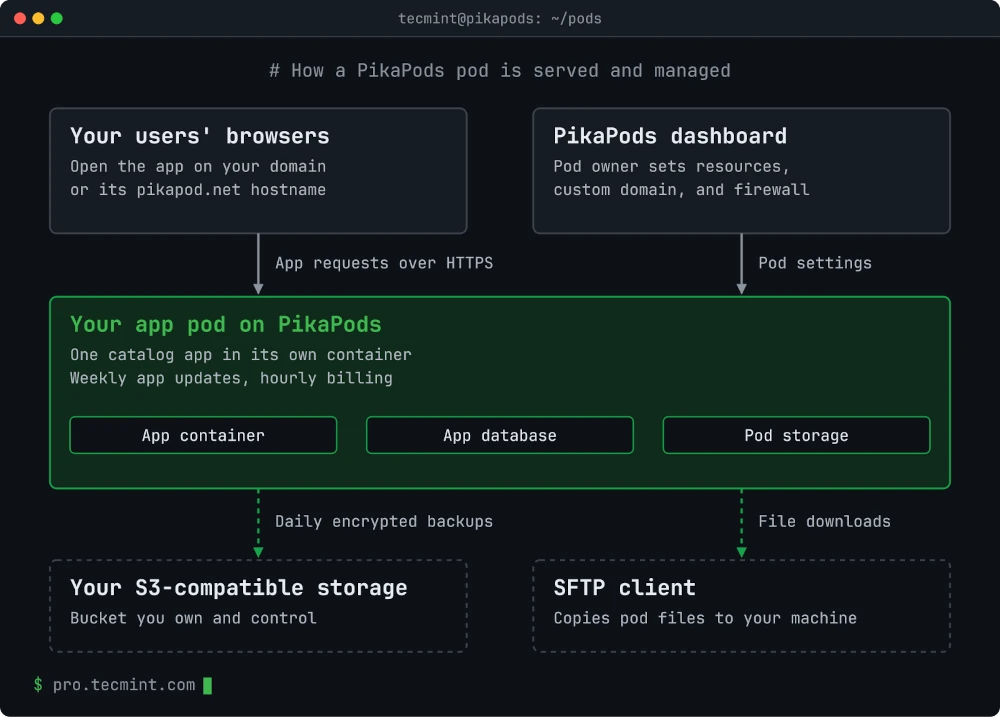
As you can see, users connect only to the application itself, using HTTPS through either the default pikapod.net address or your custom domain. You manage everything else from the PikaPods dashboard, where you can adjust resources, configure the domain, review logs, and manage firewall rules.
The S3 storage and SFTP client shown outside the pod are services you provide yourself. PikaPods can send encrypted backups to storage you control, while SFTP lets you retrieve the application’s files directly. That makes it easier to keep your own copies of important data and reduces the risk of being completely tied to the platform.
PikaPods Pricing: Hourly Billing Based on Pod Resources
Now that we know a pod is simply an application with a fixed amount of CPU, memory, and storage, the PikaPods pricing model is fairly straightforward because you pay for the resources assigned to each pod.
PikaPods does not use fixed subscription tiers. Instead, you add prepaid credit to your account, and each pod is billed by the hour based on the CPU, RAM, and storage you choose for it.
When creating a pod, you can use sliders to adjust the available resources. At the time of writing, PikaPods allows you to select between 0.25 and 6 CPU cores, 0.25 and 16 GB of memory, and up to 1,000 GB of storage. As you move the sliders, the setup page updates the estimated monthly cost, so you can see how each resource change affects the price before creating the pod.
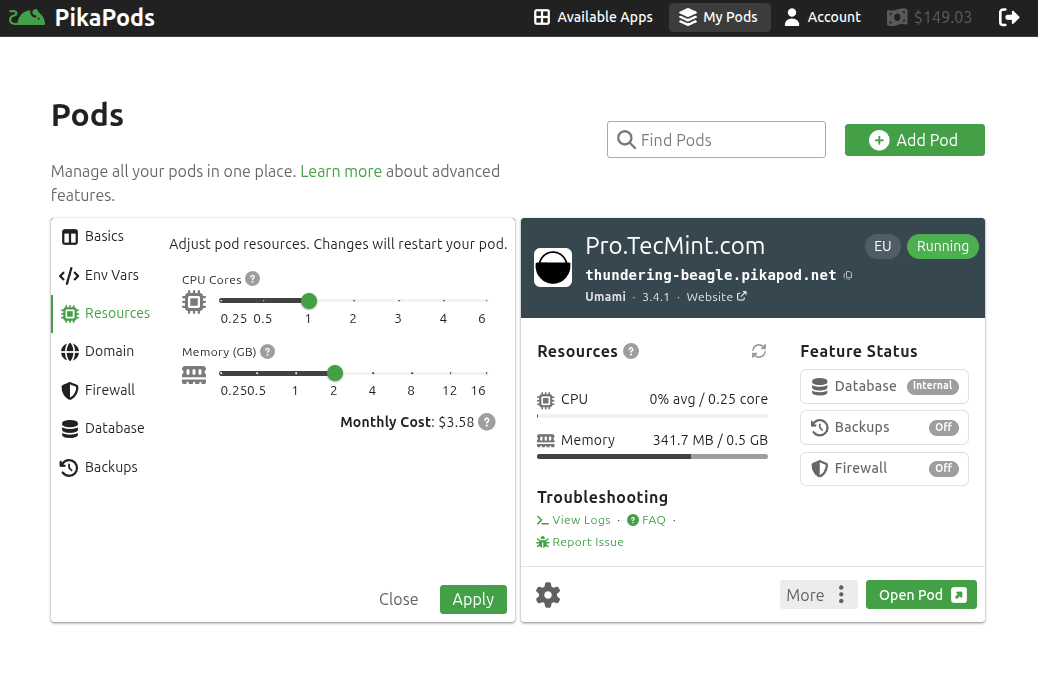
For new users, the smallest pod currently starts at $1.80 per month, excluding VAT. The actual amount you pay depends on the resources you assign and how long the pod remains running.
There are also a few billing details worth understanding. If you stop a pod, PikaPods stops charging for CPU and memory, but you still pay for the storage it uses, starting at about $1 per month.
If you delete the pod, billing for that pod stops altogether. PikaPods also notes that pricing changes generally apply to newly created pods, which means an existing pod created under an older pricing version may continue using its original price.
New accounts receive $5 in welcome credit without requiring a credit card. That is usually enough to experiment with one or two small applications and get a good idea of how the platform works before adding your own funds.
Another interesting part of the pricing model is that PikaPods shares 20% of its hosting revenue with participating open-source application developers where possible.
Create Your First Pod on PikaPods
With the pricing covered, let’s create our first pod. We will use FreshRSS, a lightweight self-hosted RSS reader, because it can run comfortably with modest resources.
After creating your account, open Available Apps and search for the application you want to run.
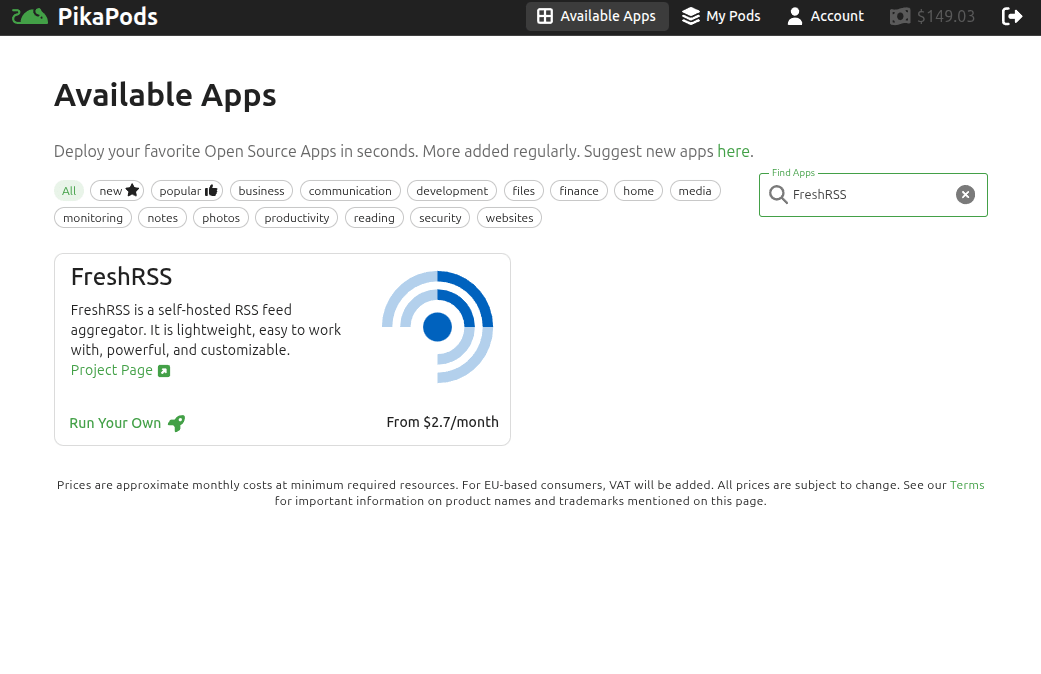
Click Run Your Own to open the new pod form. Here, give the pod a name, which also becomes part of its pikapod.net hostname, and choose the region closest to you or most of your users. Picking a nearby region can help reduce latency and keep the application feeling responsive.
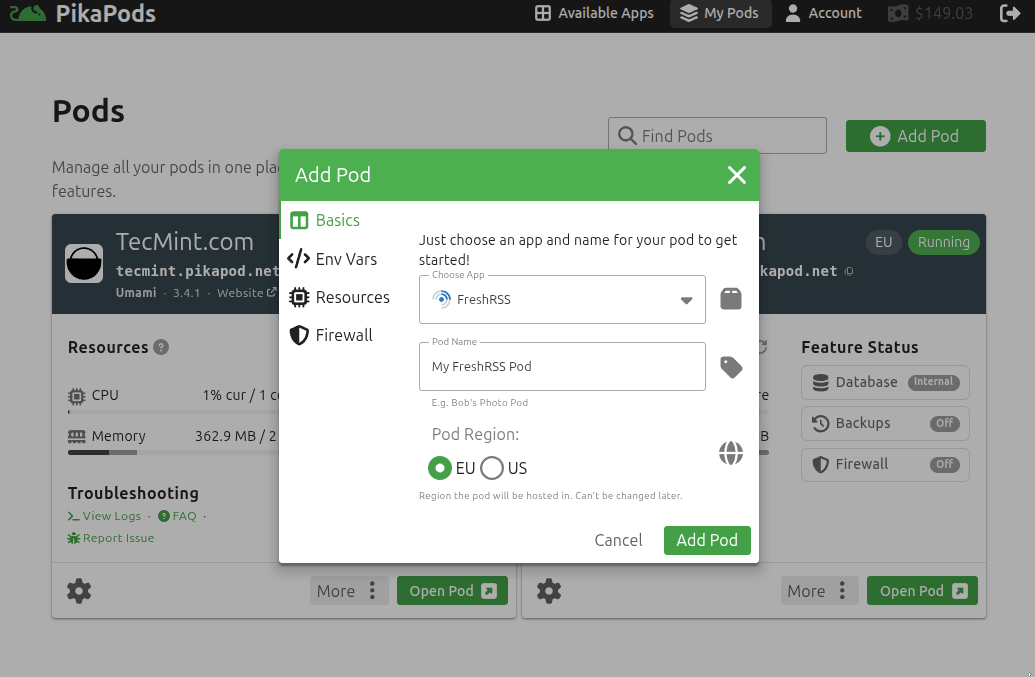
Next, choose the CPU, memory, and storage for the pod. It is usually better to start with the resources PikaPods recommends rather than assigning more than you need.
Once everything looks correct, click Add Pod. PikaPods will create and start the container, and after a short while the new pod should appear as running on the My Pods page.
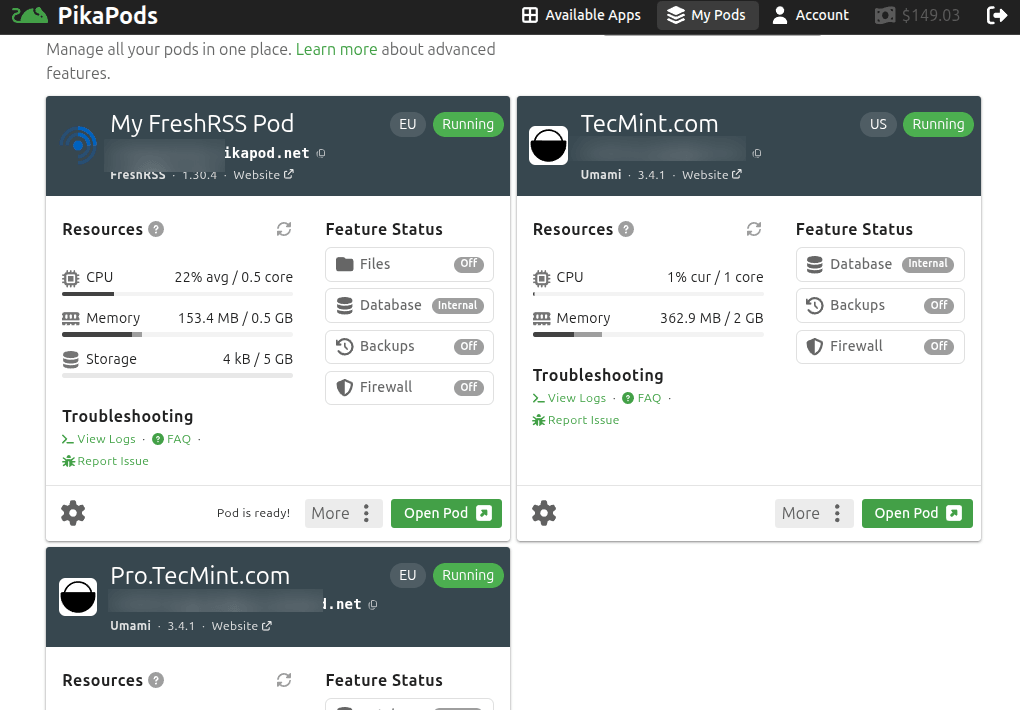
At this point, open the pod’s URL to access the application itself and complete any first-run setup it requires, such as creating an administrator account.
Use a Custom Domain on a PikaPods Pod
The default pikapod.net hostname works well, but if you plan to keep the application for regular use, it makes sense to connect your own domain.
To set this up, open the pod settings and go to the Domain tab. Turn on Custom Domain, then note the pod’s current pikapod.net hostname, because we will use it as the DNS target.

Next, open the DNS settings at your domain provider and create a record that points your chosen hostname to the pod. For a subdomain such as rss.example.com, you would normally create a CNAME record like this:
rss.example.com. 3600 IN CNAME your-pod-name.pikapod.net.
This tells DNS that rss.example.com should resolve through your pod’s pikapod.net hostname. If you want to use the root domain itself, such as example.com, PikaPods requires an ALIAS record instead.
If you use Cloudflare for DNS, keep the record set to DNS only while adding the custom domain. PikaPods needs to see the DNS record directly during verification, and Cloudflare’s proxy can interfere with that process.
After the domain has been verified, you can enable Cloudflare proxying again if you want to use it. However, if you also use Cloudflare’s Web Application Firewall, add an exception for /.well-known/*, because PikaPods uses that path when renewing the HTTPS certificate.
Before opening the application in a browser, let’s confirm that the DNS record has propagated correctly. From any Linux machine with the dig command available, run:
dig +short rss.example.com CNAME
You should see your pod’s pikapod.net hostname in the output. If the command returns nothing, the DNS change may still be propagating, or the record may have been created with the wrong name.
Once DNS is resolving correctly, check that the application is responding over HTTPS:
curl -sI https://rss.example.com
If you see a certificate error instead, PikaPods may still be issuing the TLS certificate. In our experience, this usually completes within a few minutes after the DNS record is correctly in place.
How TecMint Hosts Umami Analytics on PikaPods
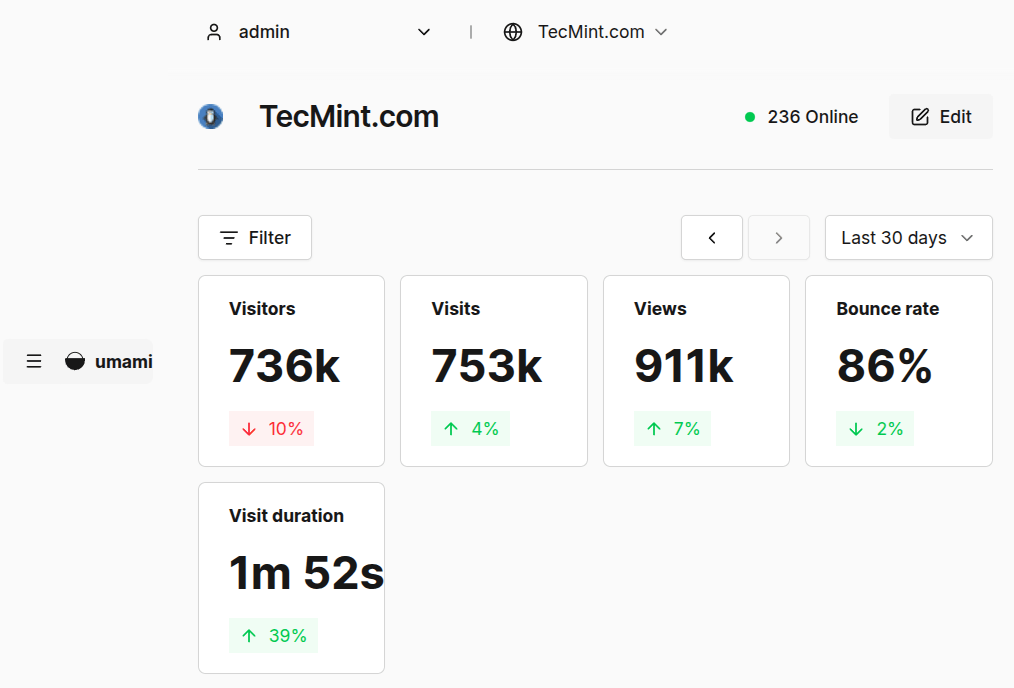
Everything we have covered so far applies to any supported application, but it is also useful to see how the same setup works in production. At TecMint, we use PikaPods to host our own website analytics.
Our analytics platform is Umami, an open-source, cookie-free analytics tool that tracks page views and visitor activity without relying on traditional tracking cookies.
For our current setup, the pod costs about $3 per month, which is less than the smallest VPS we would otherwise rent, maintain, update, and secure just for analytics.
On the TecMint side, the only change needed was adding Umami’s tracking script to the site’s <head> section. With your own domain and website ID, it looks like this:
<script defer src="https://stats.example.com/script.js" data-website-id="your-website-id"></script>
The src attribute points to the Umami instance, while data-website-id tells Umami which website the visitor belongs to. Once the script is added, page visits start appearing in the Umami dashboard.
Is PikaPods Worth It?
For small, single-purpose open-source applications where saving maintenance time matters more than having root access, PikaPods is easy to recommend. In our own case, the Umami pod has been running TecMint’s analytics without requiring us to maintain a separate server, install updates manually, or worry about the usual VPS housekeeping.
That said, PikaPods is not a replacement for every VPS. If you need SSH access, want to run custom Docker images, install extra packages, or host software that is not available in the PikaPods catalog, then a regular VPS is still the better choice because it gives you full control over the system.
If you want to run automation tools in the same managed way, PikaPods also supports n8n. Once your instance is running, our n8n: Build Real Automations and AI Agents course walks you through creating practical workflows and AI-powered automations step by step.
We would also like to hear how you host your own open-source applications. Are you using PikaPods, a VPS, or a home server, and what made you choose that setup? Is there an application you would never move to a managed host because you prefer having complete control over it? Share your experience in the comments.