Managing Docker containers using the command line can be challenging, especially for beginners, which is why Portainer CE (Community Edition) is a free, lightweight, and user-friendly tool that simplifies Docker management by providing a web-based interface, allowing you to efficiently manage containers, images, networks, and volumes without manually running long terminal commands.
In this guide, you will learn how to install and configure Portainer CE with Docker on a Linux system.
Prerequisites
Before you begin, make sure you have:
- A Linux system (Ubuntu, Debian, RHEL, or any other Linux distribution).
- A user account with sudo privileges.
- Docker installed on your system.
If Docker is not installed, follow the steps below to install it.
Step 1: Install Docker on Linux
Portainer runs as a Docker container, so you need Docker installed first, follow the steps below based on your Linux distribution.
Install the latest Docker version on Debian-based distributions such as Ubuntu and Mint:
sudo apt update
sudo apt install -y ca-certificates curl gnupg
sudo install -m 0755 -d /etc/apt/keyrings
curl -fsSL https://download.docker.com/linux/ubuntu/gpg | sudo tee /etc/apt/keyrings/docker.asc > /dev/null
echo "deb [arch=$(dpkg --print-architecture) signed-by=/etc/apt/keyrings/docker.asc] https://download.docker.com/linux/ubuntu $(lsb_release -cs) stable" | sudo tee /etc/apt/sources.list.d/docker.list > /dev/null
sudo apt update
sudo apt install -y docker-ce docker-ce-cli containerd.io
For RHEL-based systems (CentOS, AlmaLinux, Rocky Linux, Fedora):
sudo dnf config-manager --add-repo https://download.docker.com/linux/centos/docker-ce.repo
sudo dnf install -y docker-ce docker-ce-cli containerd.io
By default, Docker requires root privileges, which is inconvenient, so enable non-root users to run Docker commands without sudo.
sudo usermod -aG docker $USER
newgrp docker
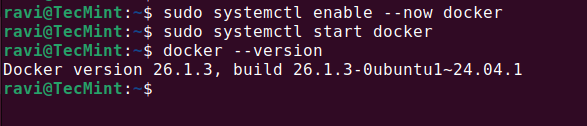
Once installed, enable Docker to start on boot and start the service.
sudo systemctl enable --now docker
sudo systemctl start docker
Verify the installation.
docker run hello-world
docker --version
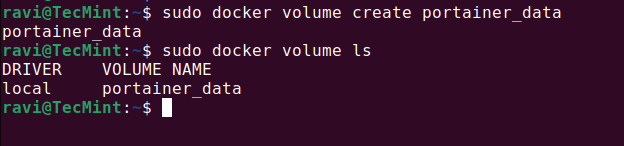
Step 2: Create a Docker Volume for Portainer
Portainer requires a volume to store persistent data, such as container information and settings, so create a new Docker volume for Portainer, run:
docker volume create portainer_data
You can verify the created volume using.
docker volume ls
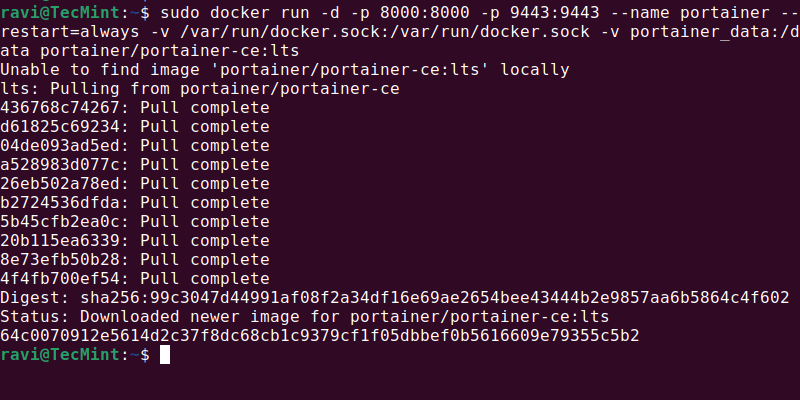
Step 3: Install and Run Portainer CE
Now, you need to pull the latest Portainer CE Docker image and run it as a container.
docker run -d -p 8000:8000 -p 9443:9443 --name portainer --restart=always -v /var/run/docker.sock:/var/run/docker.sock -v portainer_data:/data portainer/portainer-ce:lts
After running the Portainer container, open a web browser and access Portainer using your server’s IP address or localhost (if running locally).
https://your-server-ip:9443
OR
https://localhost:9443
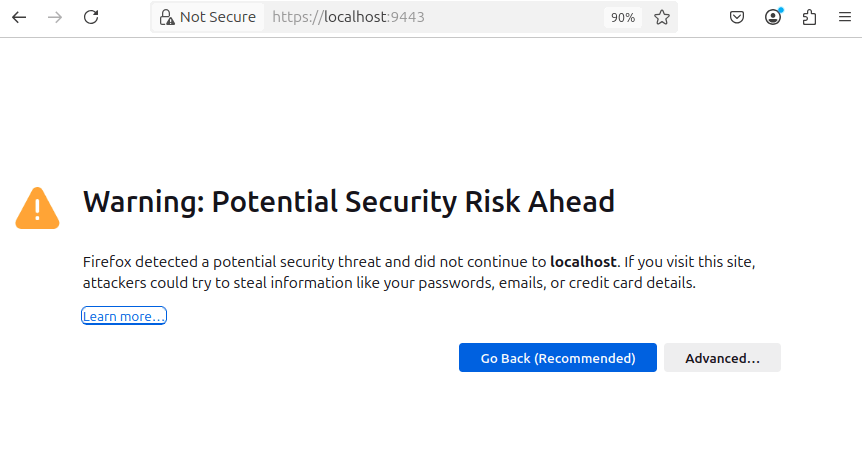
Your browser may show a security warning because Portainer uses a self-signed SSL certificate, so click on Advanced > Proceed to site to continue.
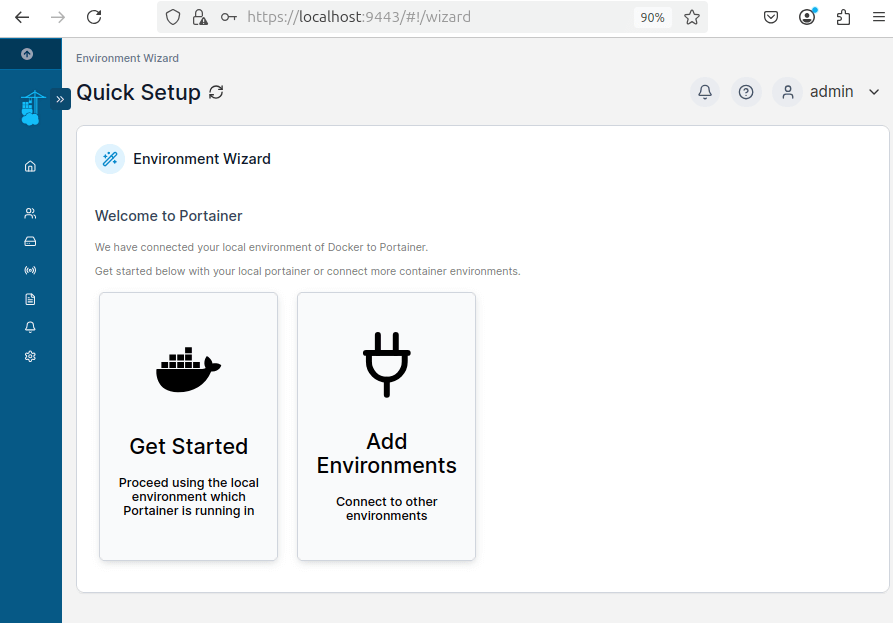
When you open Portainer for the first time, it will prompt you to create an admin account.

After setting up your admin account, you will see options to connect Portainer to an environment.
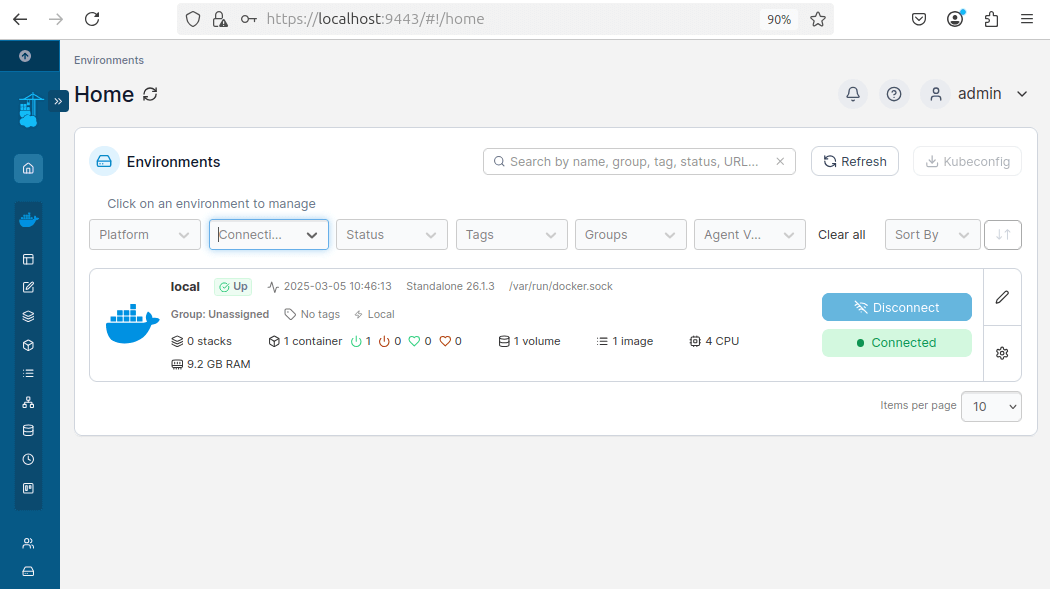
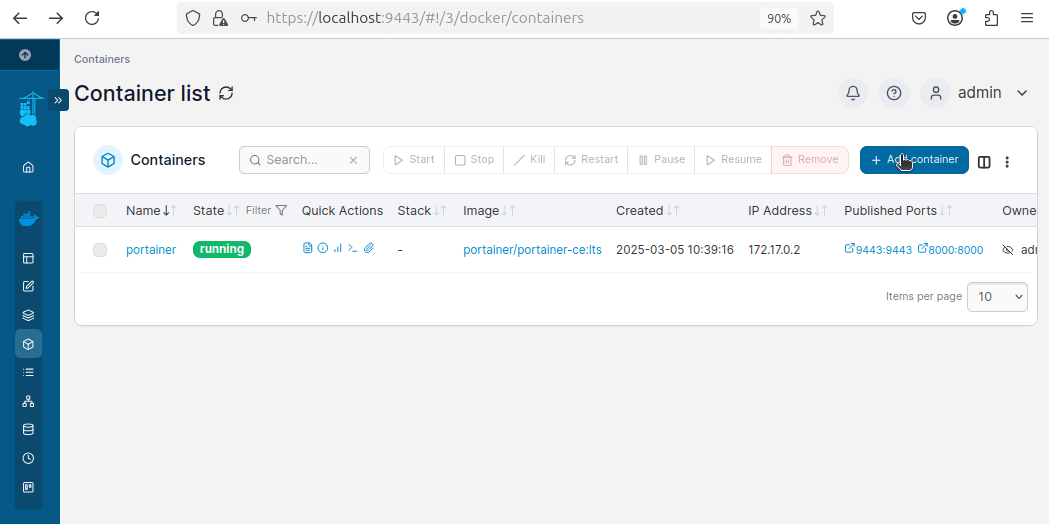
Once connected, you will see the Portainer dashboard, where you can manage containers, images, networks, and volumes.
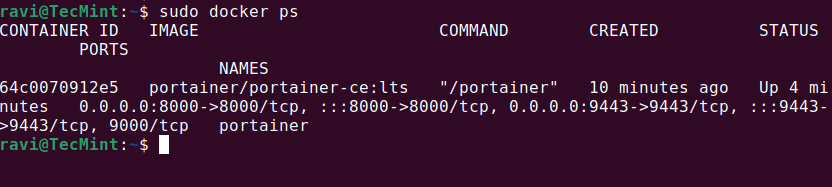
To confirm that Portainer is running correctly, use the following command:
sudo docker ps
Step 4: Managing Containers Using Portainer
Now that Portainer is installed and running, let’s see how you can use it to deploy and manage an Nginx container, which will help you understand how to create, start, stop, and manage containers easily through Portainer’s web interface.
On the dashboard, click on Containers from the left sidebar and click on the + Add container button.
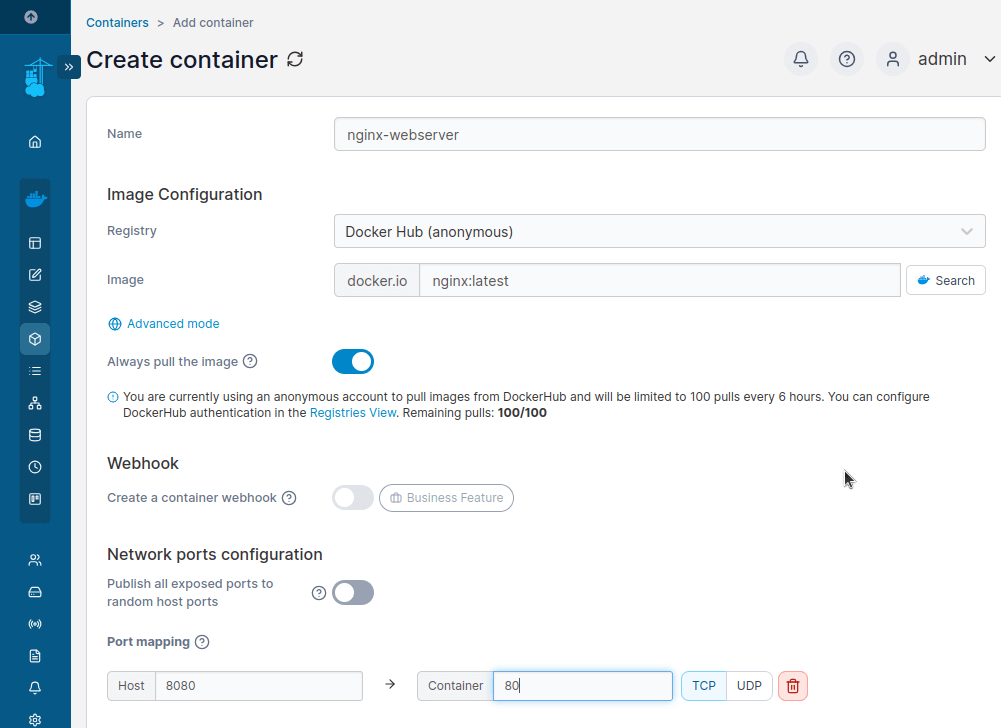
Configure the Container by adding:
- Container Name:
nginx-webserver - Image:
nginx:latest - Set the host port as
8080 - Set the container port as
80 - Scroll down and click Deploy the container.
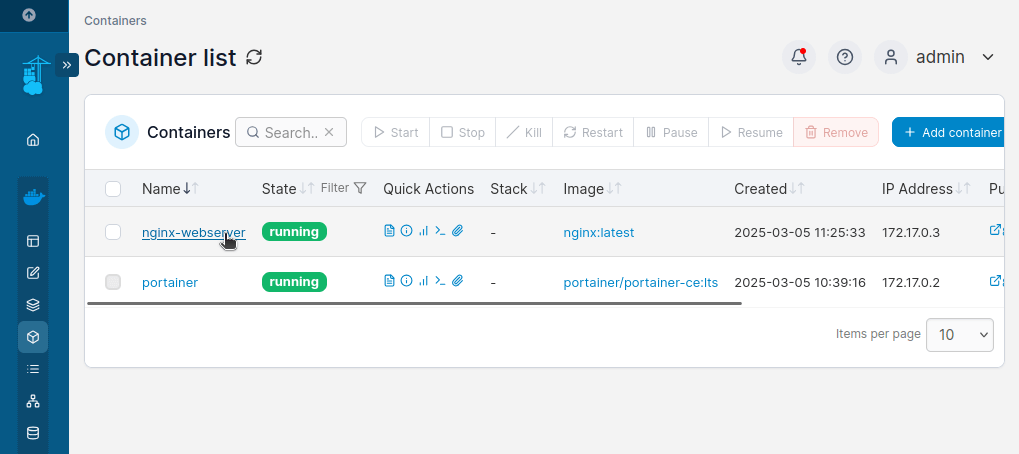
Wait a few seconds while Portainer pulls the nginx:latest image and start the container. Once the container is deployed, it will appear in the Containers list with a green running status.
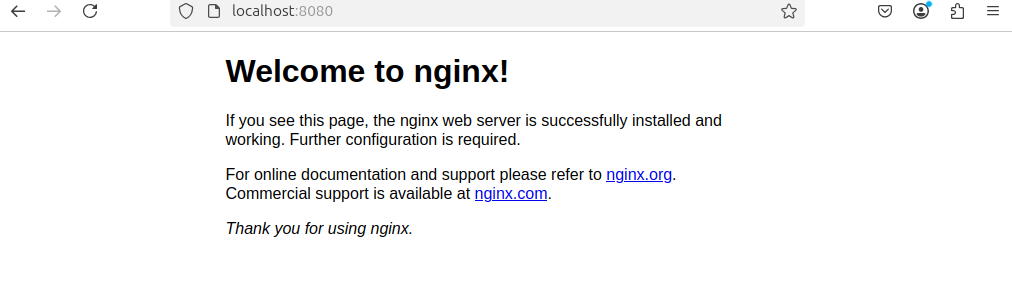
Once the container is running, open your web browser and visit.
https://your-server-ip:8080
OR
https://localhost:8080
You should see the Nginx default welcome page, confirming that the Nginx container is running successfully.
Step 5: Manage Portainer in Linux
After installation, Linux users may need to start, stop, or restart Portainer manually:
docker start portainer   # Start Portainer
docker stop portainer    # Stop Portainer
docker restart portainer # Restart Portainer
docker rm -f portainer   # Remove Portainer
Conclusion
You have successfully installed and configured Portainer CE with Docker on your Linux system. With Portainer’s web interface, you can now easily manage your containers, images, volumes, and networks without using the command line.