If you’ve ever managed a hosting server, you know that cPanel & WHM is one of the most popular control panels in the web hosting industry, which makes server management much easier, especially for beginners who don’t want to spend hours tweaking config files manually.
In this post, I’ll walk you through installing cPanel & WHM on AlmaLinux 9.
What are cPanel & WHM?
- cPanel → This is the control panel for end-users (website owners), which lets you manage websites, domains, databases, and email accounts.
- WHM (WebHost Manager) → This is the administrator side, where you manage the server, create hosting accounts, and handle security.
Together, they make running a hosting server much more user-friendly than doing everything by hand.
Why AlmaLinux 9?
Since the end of CentOS 8, AlmaLinux has become a popular replacement for web servers because it is free, community-driven, and fully compatible with RHEL (Red Hat Enterprise Linux).
cPanel now officially supports AlmaLinux 9 (starting with cPanel v114), which means you get a secure, stable, and modern OS for your hosting environment.
System Requirements
Before installing, make sure your server meets these requirements:
- CPU: 1.1 GHz single-core (Recommended: Multi-core for better performance)
- RAM: 2 GB (Recommended: 4 GB+)
- Disk Space: 20 GB (Recommended: 40 GB+)
- Architecture: 64-bit (Recommended: 64-bit)
Other important notes:
- Use a fresh AlmaLinux 9 install without any pre-install web servers (Apache, Nginx, MySQL, etc.), as cPanel manages its own stack.
- Set up a static IP address (DHCP causes problems).
- Configure a fully qualified domain name (FQDN) for the hostname, like host.example.com.
- Disable SELinux (cPanel does not support it).
- You must have root access to the server.
Pro Tip: Always install cPanel on a clean server to avoid conflicts and make the installation smoother.
1. Update Your Server
Before installing cPanel, let’s make sure your system is fully up to date, which prevents conflicts and ensures you have the latest security patches:
dnf update -y
dnf upgrade -y

After the update, you must reboot the server so the newly installed kernel can take effect.
reboot
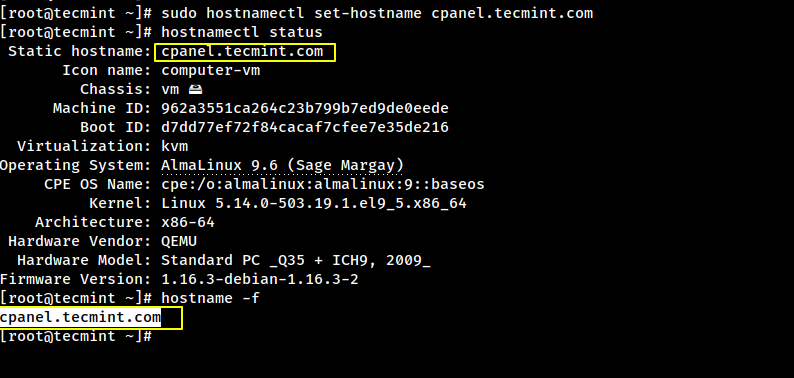
2. Set a Proper Hostname
cPanel requires the server hostname to be a Fully Qualified Domain Name (FQDN), which means it must include both a host label and a domain name (e.g., host.example.com).
To set a hostname, you can use the hostnamectl command as shown.
sudo hostnamectl set-hostname host.example.com
Make sure your chosen hostname (e.g., host.example.com) is mapped to your server’s public IP address in DNS, with both forward and reverse DNS resolving correctly.
Avoid using the root domain (example.com) as the hostname; instead, assign a subdomain such as server.example.com, host.example.com, or cpanel.example.com for proper configuration.
You can verify the change with:
hostnamectl status
hostname -f
3. Disable SELinux (Required for cPanel)
cPanel does not support SELinux, so you must disable it both temporarily (for the current session) and permanently (so it stays disabled after reboot):
# Temporarily set SELinux to permissive mode
setenforce 0

# Permanently disable SELinux by editing the config file
sed -i 's/^SELINUX=enforcing/SELINUX=disabled/' /etc/selinux/config
Reboot the server to apply the changes:
reboot
After reboot, verify SELinux is disabled:
getenforce
4. Install Required Packages
Before you can run the cPanel installer, your server needs a few basic tools to be installed.
dnf install -y perl wget curl screen
Here’s what each one does:
- perl → The cPanel installer depends on it.
- wget / curl → Used to download the installation script.
- screen → Lets the installation keep running even if your SSH session disconnects.
Tip: Using screen is especially handy if your internet connection is unstable. Just type screen before running the installer, and you can safely disconnect and reconnect later.
5. Disable Firewall (Temporarily)
cPanel manages its own firewall rules during installation, so it’s best to temporarily disable any existing firewall to prevent conflicts:
systemctl stop firewalld
systemctl disable firewalld
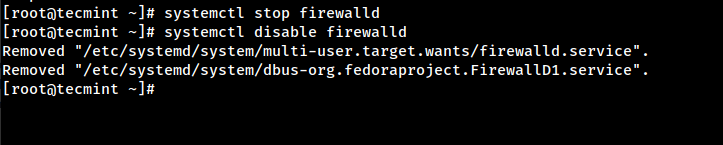
Don’t worry! After installation, you should re-enable a firewall for security, such as CSF (ConfigServer Security & Firewall), which is highly recommended.
6. Run the cPanel Installer
Now comes the exciting part! cPanel installation is straightforward but can take 30-60 minutes, depending on your server specification.
Navigate to the /home directory:
cd /home
Download the latest cPanel installer script:
curl -o latest -L https://securedownloads.cpanel.net/latest
Run the installer:
sh latest
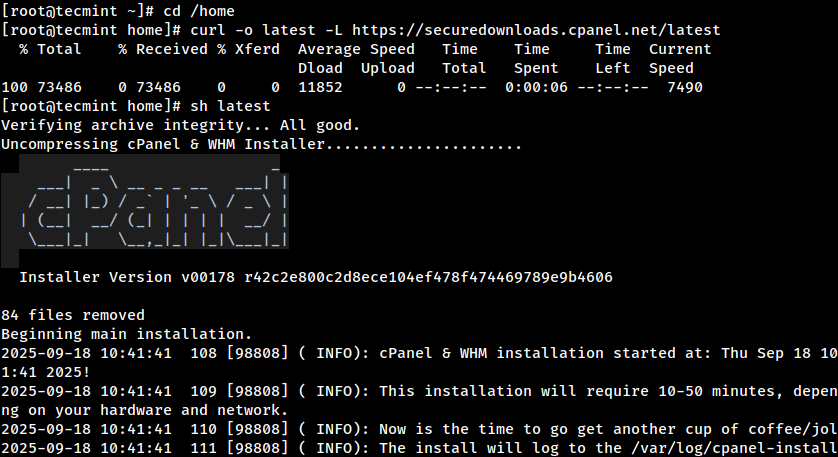
The installer will automatically set up everything cPanel needs, such as Apache (web server), PHP, MySQL/MariaDB, Exim (mail server), DNS services, and more.
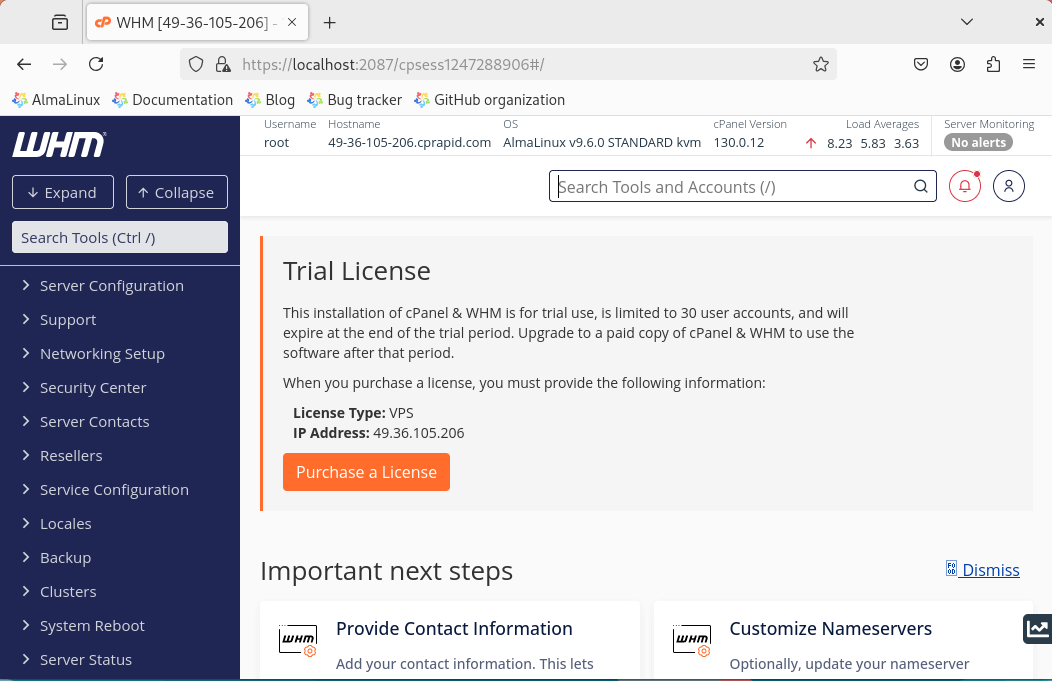
7. Access WHM Panel
Once the installation completes, you can log into WHM to finalize your setup:
https://your-server-ip:2087
You can log into WHM using your server’s root credentials.
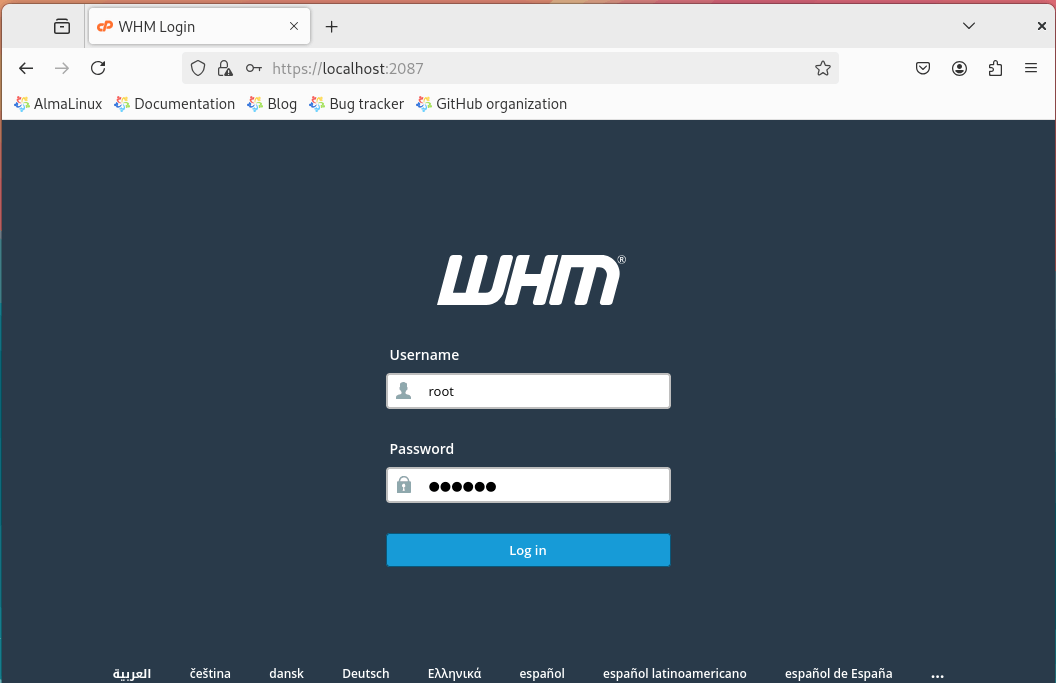
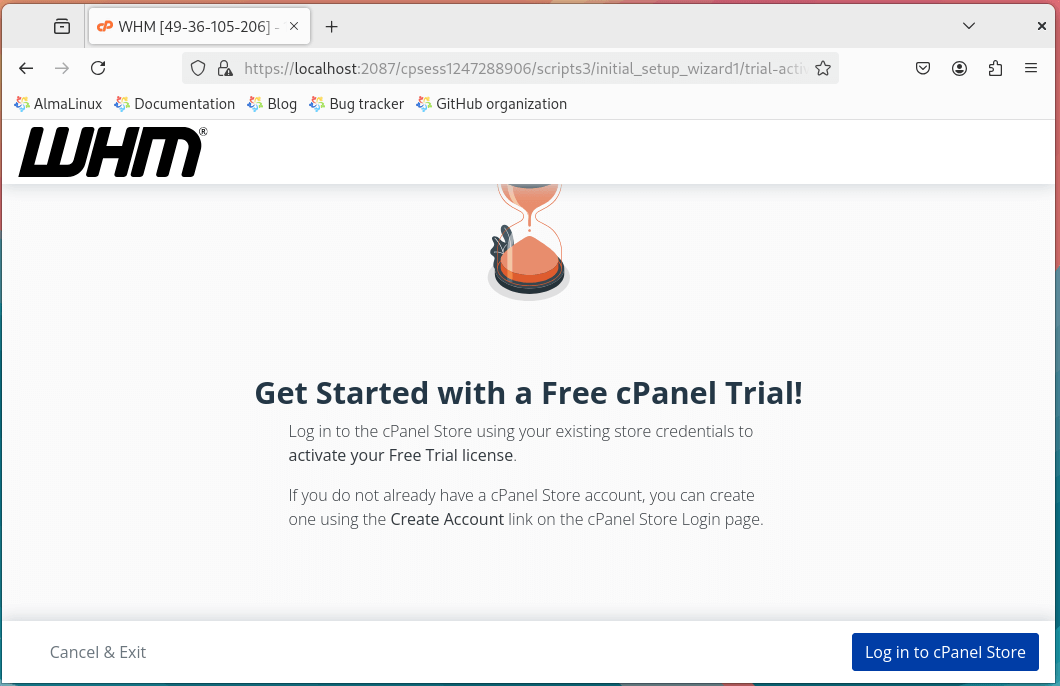
Once logged in, the WHM setup wizard will guide you through the initial configuration, including entering your contact information, setting up nameservers, configuring networking settings, and choosing your preferred service options.
Tip: A trial license is fully functional, so you can explore all features without limitations before deciding whether to buy.
Conclusion
Installing cPanel & WHM on AlmaLinux 9 is actually pretty simple if you follow the steps carefully. With cPanel, managing websites, emails, and databases becomes a lot easier, even for beginners.
This setup is perfect for hosting providers, freelancers, or anyone running multiple websites. Once it’s up and running, your server will be ready to host sites safely, smoothly, and efficiently.