PostgreSQL (Postgres in short) is an open source, powerful, advanced, high-performance, and stable relational-document database system, which extends the SQL language and includes a wide range of features for secure data storage and management.
It is efficient, reliable, and scalable for handling large, complicated volumes of data and setting up enterprise-level and fault-tolerant environments, while ensuring high data integrity.
Postgres is also highly extensible with features such as advanced indexing, full-text search, and comes with APIs so that you can develop your own solutions to solve your data storage challenges.
In this article, we will explain how to install PostgreSQL 18 (which was just released on September 25, 2025) on an Ubuntu 24.04 LTS server and learn essential ways to use it effectively.
How to Install PostgreSQL on Ubuntu 24.04
PostgreSQL comes prepackaged with all Ubuntu versions by default. However, Ubuntu includes a specific “snapshot” of PostgreSQL that remains fixed for the entire lifecycle of that Ubuntu release.
If you want access to newer PostgreSQL versions, then you can use the following automated repository configuration script that automatically set up the official PostgreSQL Apt repository.
sudo apt install -y postgresql-common ca-certificates
sudo /usr/share/postgresql-common/pgdg/apt.postgresql.org.sh
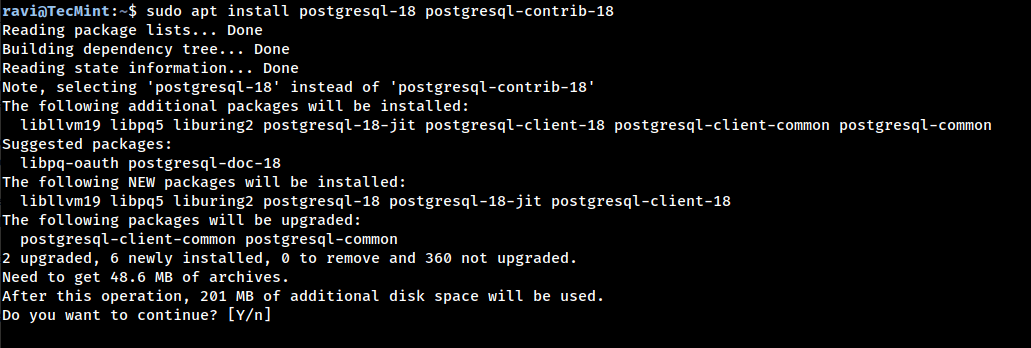
Now update the package list and install PostgreSQL (the latest version is PostgreSQL 18 as of today):
sudo apt update
sudo apt install postgresql-18 postgresql-contrib-18
Install pgAdmin 4 for PostgreSQL Administration
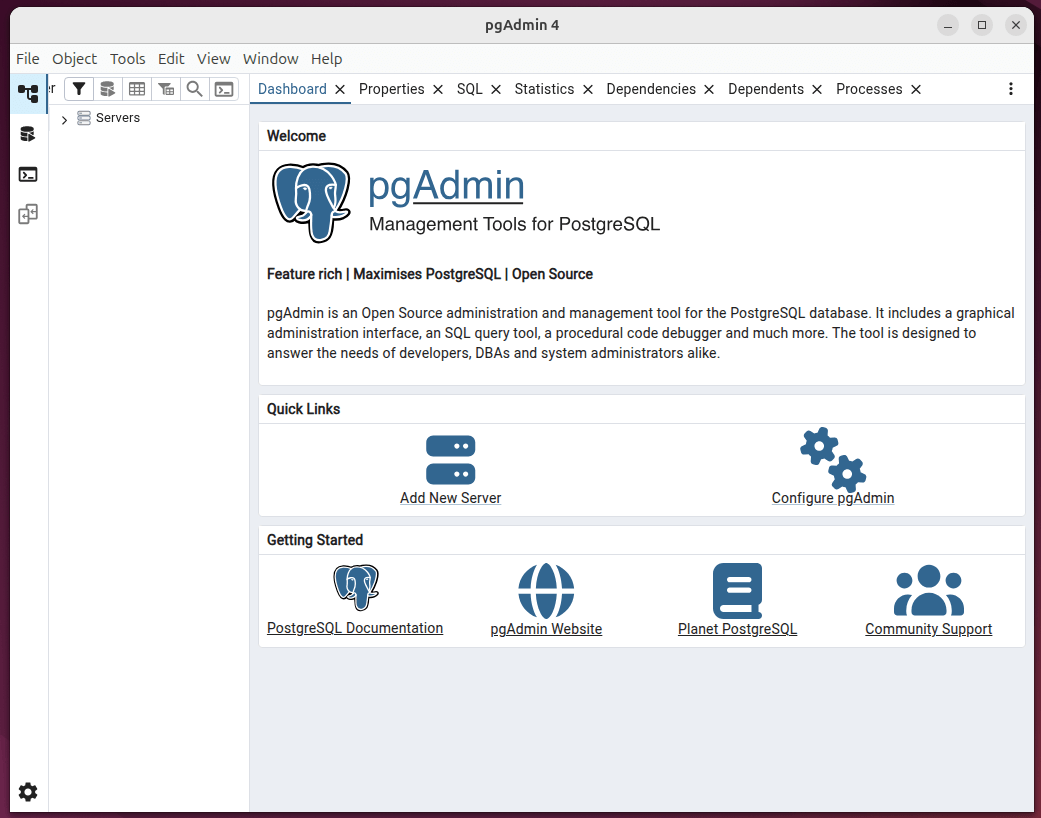
If you prefer a graphical interface to manage your PostgreSQL databases, you can install pgAdmin 4, the official PostgreSQL management tool that allows you to manage databases, users, queries, and more – all from a web-based dashboard.
On Ubuntu 24.04, pgAdmin 4 isn’t available in the default repositories, so we’ll use the official pgAdmin repository.
sudo apt install -y curl ca-certificates gnupg
curl -fsS https://www.pgadmin.org/static/packages_pgadmin_org.pub | sudo gpg --dearmor -o /usr/share/keyrings/packages-pgadmin-org.gpg
sudo sh -c 'echo "deb [signed-by=/usr/share/keyrings/packages-pgadmin-org.gpg] https://ftp.postgresql.org/pub/pgadmin/pgadmin4/apt/$(lsb_release -cs) pgadmin4 main" > /etc/apt/sources.list.d/pgadmin4.list && apt update'
Once the pgAdmin repository has been added, you can install pgAdmin 4 as shown.
# Install for both desktop and web modes
sudo apt install pgadmin4

# Install for desktop mode only
sudo apt install pgadmin4-desktop

# Install for web mode only
sudo apt install pgadmin4-web

# Configure the webserver, if you installed pgadmin4-web:
sudo /usr/pgadmin4/bin/setup-web.sh
After the installation, the PostgreSQL service should start automatically, and you can confirm its status by running:
sudo systemctl status postgresql
To enable PostgreSQL to start on boot (if not already enabled):
sudo systemctl enable postgresql
After running this, you can open pgAdmin in your browser at:
http://127.0.0.1/pgadmin4
How to Use PostgreSQL Roles and Databases
In PostgreSQL, client authentication is controlled by the /etc/postgresql/18/main/pg_hba.conf configuration file (the version number may differ based on your installation).
The default authentication method is "peer" for the database administrator, meaning it gets the client’s operating system user name and checks if it matches the requested database user name to allow access for local connections.
During the installation process, a system user account called postgres was created without a password, which is also the default database administrator user name.
sudo nano /etc/postgresql/18/main/pg_hba.conf
Understanding PostgreSQL Roles
In PostgreSQL, database access permission management is performed via roles. A role can be considered as either a database user, or a group of database users, depending on how the role is set up.
The default role is also postgres. Importantly, database roles are conceptually fully unconnected to operating system users, but practically they may be linked (particularly for authentication purposes).
Roles can:
- Own database objects (tables, views, functions, etc.).
- Assign privileges on those objects to other roles.
- Grant membership in a role to another role (role inheritance).
Enable Encrypted Passwords for PostgreSQL Roles
To configure roles to use encrypted passwords instead of peer authentication, you need to modify the pg_hba.conf file. Change the authentication method from peer to scram-sha-256 (the modern secure method) or md5 for password authentication.
sudo nano /etc/postgresql/18/main/pg_hba.conf
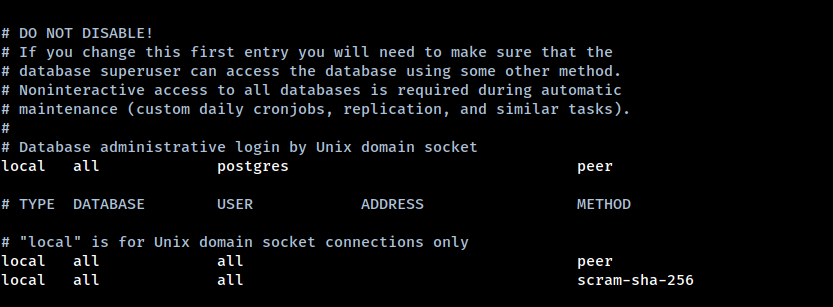
Find the lines that look like:
# TYPE  DATABASE        USER            ADDRESS                 METHOD
local   all             all                                     peer
And change to:
# TYPE  DATABASE        USER            ADDRESS                 METHOD
local   all             postgres                                peer
local   all             all                                     scram-sha-256
This keeps peer authentication for the postgres user but requires passwords for other users.
Then restart the PostgreSQL service to apply the changes:
sudo systemctl restart postgresql
How to Use PostgreSQL on Ubuntu
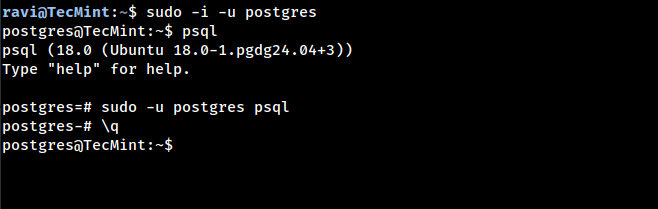
Once everything is set up, you can access the postgres system account with the following command, where the -i flag tells sudo to run the shell specified by the target user’s password database entry as a login shell.
sudo -i -u postgres
psql    # to launch the postgres shell program
To access the postgres shell directly, without first accessing the postgres user account, run:
sudo -u postgres psql
You can quit/exit the postgres shell by typing q or pressing Ctrl+D.
q
Create PostgreSQL Database Roles
Create a new user role using the following command:
CREATE ROLE tecmint;
To create a role with a LOGIN attribute (roles with the LOGIN attribute can be considered the same as a database users):
CREATE ROLE tecmint LOGIN;
Or use the CREATE USER command, which assumes the login function by default:
CREATE USER tecmint;
Create a Role with a Password
A role can also be created with a password, which is essential if you configured the client authentication method to require encrypted passwords:
CREATE ROLE tecmint WITH LOGIN PASSWORD 'secure_password_here';
Or using the CREATE USER syntax:
CREATE USER tecmint WITH PASSWORD 'secure_password_here';
Create a Role with Additional Privileges
You can create a role with superuser privileges (use carefully):
CREATE ROLE admin WITH LOGIN PASSWORD 'admin_password' SUPERUSER;
Or create a role that can create databases:
CREATE ROLE developer WITH LOGIN PASSWORD 'dev_password' CREATEDB;
List Existing PostgreSQL Database Roles
To list the existing user roles, use any of these commands:
du -- shows actual users with details
Or:
SELECT rolname FROM pg_roles;
To see more detailed information:
du+
Modify PostgreSQL Database Roles
To change a role’s password:
ALTER ROLE tecmint WITH PASSWORD 'new_password';
To grant superuser privileges to an existing role:
ALTER ROLE tecmint WITH SUPERUSER;
To revoke superuser privileges:
ALTER ROLE tecmint WITH NOSUPERUSER;
Drop a PostgreSQL Database Role
To drop an existing user role, use the DROP ROLE command:
DROP ROLE tecmint;
Note: You cannot drop a role that owns database objects, you must first reassign or drop those objects.
Create a PostgreSQL Database
Once you have created a role with a particular name (for instance tecmint user), you can create a database which will be managed by that role:
CREATE DATABASE tecmint;
To create a database owned by a specific role:
CREATE DATABASE tecmint OWNER tecmint;
To create a database with a specific encoding:
CREATE DATABASE tecmint ENCODING 'UTF8' LC_COLLATE='en_US.UTF-8' LC_CTYPE='en_US.UTF-8' OWNER tecmint;
Grant Privileges to a Role
After creating the database, grant all privileges to the role:
GRANT ALL PRIVILEGES ON DATABASE tecmint TO tecmint;
Now to manage the database tecmint, access the postgres shell as the tecmint role:
psql -U tecmint -d tecmint
If you’re prompted for a password, enter the password you set for the role.
Create a PostgreSQL Table
We’ll create a test table called authors, which stores information about TecMint.com authors:
CREATE TABLE authors (
    code      SERIAL PRIMARY KEY,
    name      VARCHAR(40) NOT NULL,
    city      VARCHAR(40) NOT NULL,
    joined_on DATE NOT NULL
);
Note: We’re using SERIAL for the primary key, which auto-generates sequential numbers, which is more practical than manually assigning codes.
Insert Data into PostgreSQL Table
After creating a table, populate it with some data:
INSERT INTO authors (name, city, joined_on) VALUES
    ('Ravi Saive', 'Mumbai', '2012-08-15'),
    ('Aaron Kili', 'Nairobi', '2014-03-20'),
    ('Matei Cezar', 'Bucharest', '2015-06-10');
Query Data from PostgreSQL Table
To view the data stored in a table, run a SELECT command:
SELECT * FROM authors;
For specific columns:
SELECT name, city FROM authors;
With filtering:
SELECT * FROM authors WHERE city = 'Mumbai';
With ordering:
SELECT * FROM authors ORDER BY joined_on DESC;
Update Data in PostgreSQL Table
To modify existing data:
UPDATE authors SET city = 'Delhi' WHERE name = 'Ravi Saive';
Delete Data from PostgreSQL Table
To remove specific rows:
DELETE FROM authors WHERE name = 'Ravi Saive';
List PostgreSQL Database Tables
You can list all tables in the current database with:
dt
For more detailed information:
dt+
To see the table structure:
d authors
Alter PostgreSQL Table Structure
To add a new column to an existing table:
ALTER TABLE authors ADD COLUMN email VARCHAR(100);
To drop a column:
ALTER TABLE authors DROP COLUMN email;
To rename a column:
ALTER TABLE authors RENAME COLUMN code TO author_id;
Delete/Drop a PostgreSQL Table
To delete a table in the current database:
DROP TABLE authors;
To drop with cascade (removes dependent objects):
DROP TABLE authors CASCADE;
List All PostgreSQL Databases
To list all databases, use any of the following commands:
SELECT datname FROM pg_database;
Or for a detailed description:
list
Or the shorthand:
l
Delete/Drop a PostgreSQL Database
If you want to delete a database:
DROP DATABASE tecmint;
Warning: This permanently deletes all data in the database.
Switch to Another PostgreSQL Database
You can switch from one database to another easily:
connect database_name
Or the shorthand:
c database_name
Configure PostgreSQL for Remote Access
By default, PostgreSQL only accepts connections from localhost.
To allow remote connections, you need to edit postgresql.conf file.
sudo nano /etc/postgresql/18/main/postgresql.conf
Find the line:
#listen_addresses = 'localhost'
Change it to:
listen_addresses = '*'
Next, edit pg_hba.conf file.
sudo nano /etc/postgresql/18/main/pg_hba.conf
Add a line to allow connections from your network (replace 192.168.1.0/24 with your network):
# TYPE  DATABASE        USER            ADDRESS                 METHOD
host    all             all             192.168.1.0/24          scram-sha-256
Or to allow from any IP (less secure):
host all all 0.0.0.0/0 scram-sha-256
Allow PostgreSQL through the firewall:
sudo ufw allow 5432/tcp
Finally, restart PostgreSQL.
sudo systemctl restart postgresql
Basic PostgreSQL Performance Tuning
For better performance on Ubuntu 24.04, consider adjusting these settings in postgresql.conf:
sudo nano /etc/postgresql/18/main/postgresql.conf
Recommended changes (adjust based on your server’s RAM):
shared_buffers = 256MB              # 25% of RAM
effective_cache_size = 1GB          # 50-75% of RAM
maintenance_work_mem = 64MB
checkpoint_completion_target = 0.9
wal_buffers = 16MB
default_statistics_target = 100
random_page_cost = 1.1
effective_io_concurrency = 200
work_mem = 4MB
After changes, restart PostgreSQL:
sudo systemctl restart postgresql
Backup and Restore PostgreSQL Databases
To backup a single database:
pg_dump -U postgres tecmint > tecmint_backup.sql
To backup all databases.
pg_dumpall -U postgres > all_databases_backup.sql
To restore a database.
psql -U postgres tecmint < tecmint_backup.sql
Useful PostgreSQL Commands Reference
Here’s a quick reference of commonly used PostgreSQL commands:
| Command | Description |
|---|---|
l or list |
List all databases |
c dbname |
Connect to a database |
dt |
List all tables |
d tablename |
Describe table structure |
du |
List all roles/users |
dn |
List all schemas |
df |
List all functions |
dv |
List all views |
timing |
Toggle query timing |
x |
Toggle expanded display |
i filename |
Execute commands from a file |
q |
Quit psql |
h |
Help on SQL commands |
? |
Help on psql commands |
Conclusion
That’s it! In this article, we have explained how to install and use the PostgreSQL database management system on Ubuntu 24.04 LTS.
We covered installation, user management, database operations, remote access configuration, performance tuning, and backup strategies. You can send us your queries or thoughts in the comments below.
For more information, refer to the PostgreSQL 18 Official Documentation, or explore useful websites for learning PostgreSQL.