dnf update, and now something has stopped working. Instead of spending hours troubleshooting, you just want to go back to the package version that was working before.This happens more often than most Linux administrators would like to admit. Maybe a new Nginx release introduced a default configuration change that broke your virtual hosts. A Python library update changed an API that your internal scripts rely on. Or perhaps a kernel update no longer works with a third-party driver.
From DNF’s point of view, everything installed successfully, but that doesn’t always mean your applications will continue to work as expected.
Downgrading a package on RHEL-based distributions is easy when it’s an independent package, but things become more challenging when other packages depend on the newer version, because DNF may also need to downgrade related dependencies to keep the system consistent.
In this guide, you’ll learn how to check which package versions are available, safely downgrade a package, prevent it from being updated again, recover an older package from the local RPM cache, and even roll back an entire DNF transaction if an update caused problems.
How DNF Handles Downgrades
Before you start downgrading packages, it’s useful to understand what DNF does behind the scenes.
Every time you install, update, remove, or downgrade a package, DNF records the operation as a transaction in its history database. This history makes it possible to review previous changes and, in many cases, roll back an entire transaction instead of manually fixing individual packages.
When you run a package downgrade, DNF doesn’t simply replace the newer package with an older one. It first checks whether the older version is compatible with the rest of the packages currently installed on your system.
If another package depends on the newer version, DNF will detect the conflict depending on the situation, it may:
- Downgrade the required dependencies as well.
- Refuse the downgrade because it would break other installed packages.
- Ask for confirmation before making additional changes.
That’s why it’s worth answering two questions before running a downgrade:
- Is the version you want compatible with the packages currently installed on your system?
- Is the older version still available in one of your enabled repositories or in your local package cache?
Taking a minute to check these first can save you from creating even more dependency problems later.
Check What Versions Are Available
Before downgrading a package, check which version is currently installed and whether the older version is still available in your enabled repositories.
To list all available versions of a package, run:
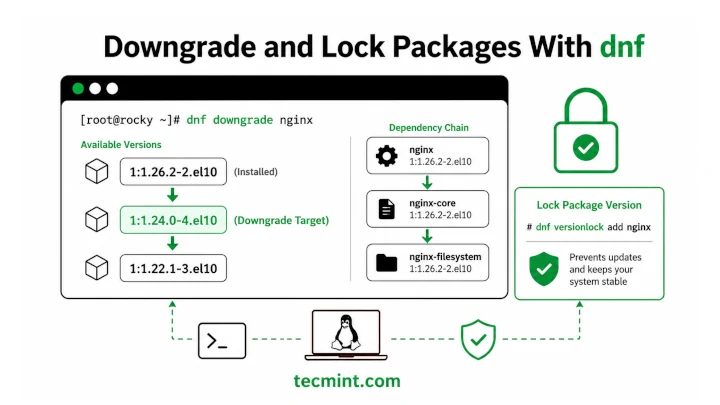
dnf list --showduplicates nginx
Example output:
Installed Packages
nginx.x86_64              1:1.26.2-2.el10             @appstream

Available Packages
nginx.x86_64              1:1.24.0-4.el10             appstream
nginx.x86_64              1:1.26.2-2.el10             appstream
The Installed Packages section shows the version currently installed on your system.
The Available Packages section lists every version that your enabled repositories currently provide. If the version you want appears here, you can downgrade to it.
If it doesn’t, the repository no longer carries that package version. Don’t worry, we’ll cover how to recover older packages from the local RPM cache later in this guide.
If you want more information about the installed package, including the repository it came from, use:
dnf info nginx
Example output:
Installed Packages
Name         : nginx
Epoch        : 1
Version      : 1.26.2
Release      : 2.el10
Architecture : x86_64
Size         : 1.7 M
Source       : nginx-1.26.2-2.el10.src.rpm
Repository   : @System
From repo    : appstream
Summary      : A high performance web server and reverse proxy server
License      : BSD
Description  : Nginx is a web server and a reverse proxy server for HTTP, SMTP,
             : POP3 and IMAP protocols, with a strong focus on high concurrency,
             : efficiency and low memory footprint.
Pay attention to the Version, Release, and Epoch fields. Together, they uniquely identify the package version. If you need to downgrade to a specific release, you’ll use this version information in the downgrade command.
dnf package management and repo configuration, the 100+ Essential Linux Commands course on Pro TecMint covers it end to end.Downgrade to the Previous Version
If you simply want to go back to the previous version of a package, use the dnf downgrade command:
sudo dnf downgrade nginx
Example output:
Dependencies resolved.
================================================================================
 Package      Arch    Version             Repository                      Size
================================================================================
Downgrading:
 nginx        x86_64  1:1.24.0-4.el10     appstream                      42 k

Transaction Summary
================================================================================
Downgrade  1 Package

Total download size: 42 k
Is this ok [y/N]: y
The sudo command runs DNF with administrator privileges, which are required when installing, removing, or downgrading system packages.
The dnf downgrade command automatically selects the highest available version that is older than the one currently installed. Review the transaction summary, and if everything looks correct, press y to continue.
Once the downgrade is complete, verify that the expected version is installed:
nginx -v
Example output:
nginx version: nginx/1.24.0
If the version shown matches the one you expected, the downgrade was successful.
nginx-core or nginx-filesystem to be downgraded along with nginx. However, if DNF wants to remove packages that other applications or services depend on, cancel the operation and investigate the dependency changes before proceeding.Downgrade to a Specific Version
If you need to downgrade to a version that’s more than one release behind, specify the package name followed by the target version:
sudo dnf downgrade nginx-1.24.0-4.el10
Example output:
Dependencies resolved.
================================================================================
 Package      Arch    Version             Repository                      Size
================================================================================
Downgrading:
 nginx        x86_64  1:1.24.0-4.el10     appstream                      42 k

Transaction Summary
================================================================================
Downgrade  1 Package

Total download size: 42 k
Is this ok [y/N]: y
Downloading Packages:
nginx-1.24.0-4.el10.x86_64.rpm        42 kB/s |  42 kB     00:01
Running transaction check
Transaction check succeeded.
Running transaction test
Transaction test succeeded.
Running transaction
  Downgrading  : nginx-1:1.24.0-4.el10.x86_64                             1/2
  Cleanup      : nginx-1:1.26.2-2.el10.x86_64                             2/2
  Verifying    : nginx-1:1.24.0-4.el10.x86_64                             1/2
  Verifying    : nginx-1:1.26.2-2.el10.x86_64                             2/2

Downgraded:
  nginx-1:1.24.0-4.el10.x86_64

Complete!
The transaction output is easy to follow:
- Downgrading shows the older package version that DNF is installing.
- Cleanup shows the newer version being removed from the system.
- Verifying confirms that the downgrade completed successfully and the RPM database is consistent.
After the transaction finishes, verify the installed version:
nginx -v
If the output shows the version you requested, the downgrade was successful.
Lock the Package Version with versionlock
After downgrading a package, the next dnf update will try to install the latest available version again. If you want to keep the package at its current version, use the versionlock plugin.
sudo dnf install python3-dnf-plugins-core
Once the plugin is available, lock the current version of the package:
sudo dnf versionlock add nginx
To see all locked packages, run:
sudo dnf versionlock list
Example output:
Last metadata expiration check: 0:02:31 ago on Mon Jun 29 11:14:08 2026.
nginx-1:1.24.0-4.el10.*
The .* at the end is a wildcard that matches all architectures of that package version. With the lock in place, future dnf update commands will skip nginx, leaving it at the version you’ve pinned.
When you’re ready to receive updates again, remove the lock:
sudo dnf versionlock delete nginx
exclude=nginx to /etc/dnf/dnf.conf. However, exclude blocks all future updates for that package until you remove the setting.Downgrade From a Local RPM File
Sometimes the version you need is no longer available in your enabled repositories. It may have been replaced by a newer release, removed from the repository, or you’re working on a system without internet access.
If you still have the older RPM file, you can install it directly.
First, check whether the package is still available in DNF’s local cache:
find /var/cache/dnf -name "nginx*.rpm"
Example output:
/var/cache/dnf/appstream-3f8c21a9d4b72e01/packages/nginx-1.24.0-4.el10.x86_64.rpm
If you find the version you need, install it by specifying the full path to the RPM file:
sudo dnf install /var/cache/dnf/appstream-3f8c21a9d4b72e01/packages/nginx-1.24.0-4.el10.x86_64.rpm
Example output:
Examining /var/cache/dnf/appstream-3f8c21a9d4b72e01/packages/nginx-1.24.0-4.el10.x86_64.rpm: 1:nginx-1.24.0-4.el10.x86_64
Marking nginx-1.24.0-4.el10.x86_64.rpm as an update to 1:nginx-1.26.2-2.el10.x86_64
Dependencies resolved.
================================================================================
 Package  Arch    Version           Repository                          Size
================================================================================
Downgrading:
 nginx    x86_64  1:1.24.0-4.el10   @commandline                       42 k

Transaction Summary
================================================================================
Downgrade  1 Package
Is this ok [y/N]: y
...
Complete!
Even though you’re installing an RPM file manually, DNF recognizes that the package is older than the installed version and performs a downgrade instead of a normal installation. It also checks dependencies just as it would when installing from a repository.
If you downloaded the RPM from another system or an external source, verify its signature before installing it:
rpm --checksig nginx-1.24.0-4.el10.x86_64.rpm
Use DNF History to Roll Back an Entire Transaction
If a system update broke more than one package, you don’t have to downgrade each package individually. DNF keeps a history of every transaction, making it possible to undo an entire update with a single command.
First, view your recent DNF transactions:
sudo dnf history list
Example output:
ID     | Command line              | Date and time    | Action(s) | Altered
-------------------------------------------------------------------------------
    12 | update nginx              | 2026-06-29 09:14 | Update    |       1
    11 | install httpd             | 2026-06-28 14:22 | Install   |       3
    10 | update                    | 2026-06-27 08:00 | Update    |      47
     9 | install python3-flask     | 2026-06-26 16:44 | Install   |       5
Each transaction has a unique ID. You’ll use this ID if you want to inspect or undo a specific operation.
To see exactly what changed during a transaction, run:
sudo dnf history info 12
Example output:
Transaction ID : 12
Begin time     : Sun Jun 29 09:14:22 2026
Begin rpmdb    : 847:f3a2c...
End time       : Sun Jun 29 09:14:38 2026 (16 seconds)
End rpmdb      : 847:9b14d...
User           : root
Return-Code    : Success
Command Line   : update nginx
Transaction performed with:
    Installed     rpm-4.19.1-1.el10.x86_64
    Installed     dnf-4.18.0-1.el10.noarch
Packages Altered:
    Upgrade  nginx-1:1.26.2-2.el10.x86_64  @appstream
             nginx-1:1.24.0-4.el10.x86_64  @System
This output shows that transaction 12 upgraded nginx from version 1.24.0 to 1.26.2.
To undo that transaction, run:
sudo dnf history undo 12
After you confirm the transaction, DNF restores the packages to the versions they had before transaction 12 was applied.
If you simply want to undo the most recent DNF transaction, you don’t need to look up its ID:
sudo dnf history undo last
Handle Broken Dependencies After a Downgrade
If you end up in a state where dnf is refusing to install or update anything because of broken dependencies, run a consistency check first:
sudo dnf check
Example output:
nginx-1:1.24.0-4.el10.x86_64 requires nginx-filesystem = 1:1.24.0-4.el10
nginx-filesystem-1:1.26.2-2.el10.x86_64 is a newer version
This output tells you exactly what’s broken and why. In this case, nginx was downgraded but nginx-filesystem wasn’t, so the version requirement is unmet.
Fix it by downgrading the dependency too:
sudo dnf downgrade nginx-filesystem
Run dnf check again to confirm nothing else is broken:
sudo dnf check
No output means the RPM database is consistent and all dependencies are satisfied.
Have you used dnf history undo to recover from a bad update, or found a faster way to track down the right version when the repo no longer carries it? Share it in the comments below.