Creating a Deb package repository on SourceForge is a great way to distribute your Debian or Ubuntu packages to users in a structured and easy-to-manage way.
In this guide, we will use Reprepro, a powerful tool that helps manage repositories for Debian-based distributions.
Prerequisites
Before we begin, you need to have the following:
- A Debian or Ubuntu-based system.
- An account on SourceForge.
- Reprepro is installed on your local machine.
- Your Deb packages are ready to be uploaded.
Step 1: Create a Project on SourceForge
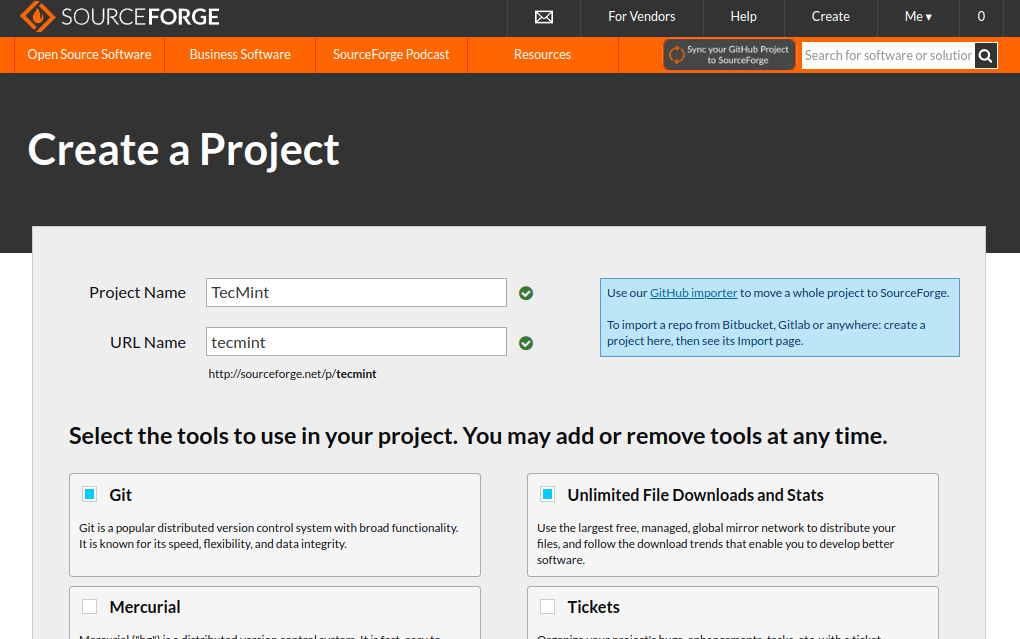
If you don’t already have a project on SourceForge, then create one by visiting SourceForge and clicking on Create and fill in the required details for your new project, such as the name, description, and category.

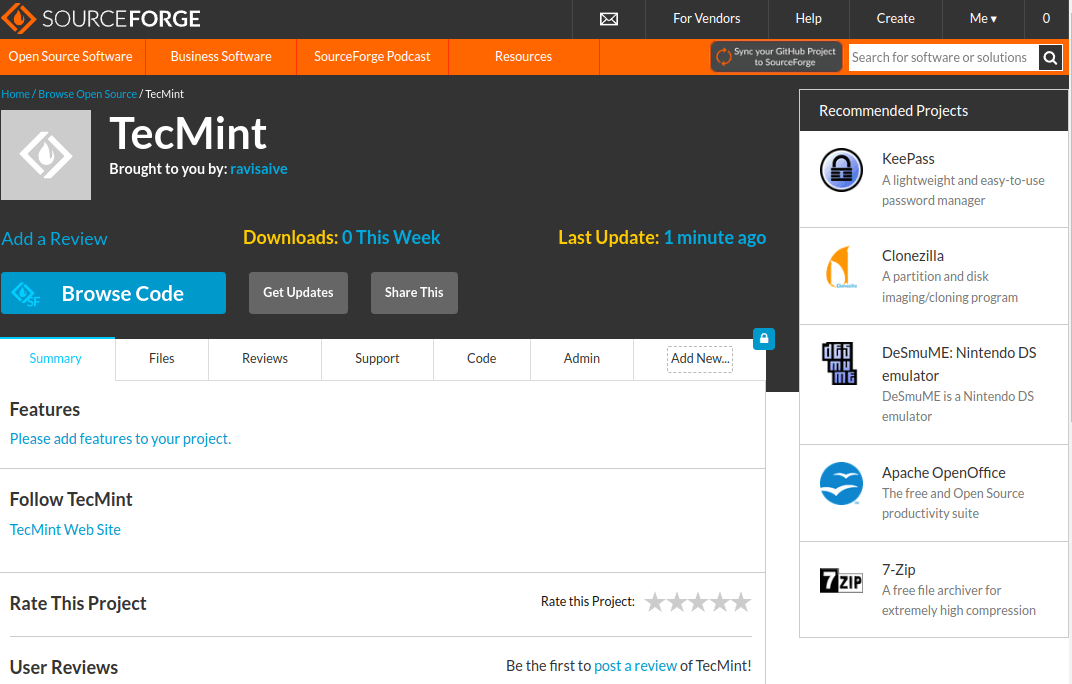
Once the project is created, SourceForge will give you access to a file repository where you can upload your files.
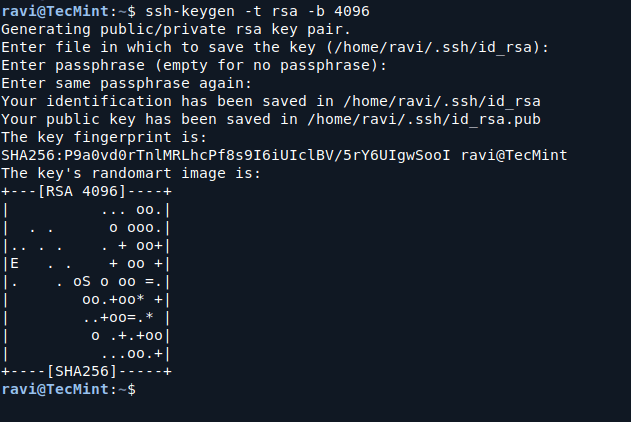
Next, you need to add your SSH public key to SourceForge to enable SSH access for uploading files. First, generate an SSH public key on your system using the following command.
ssh-keygen -t rsa -b 4096
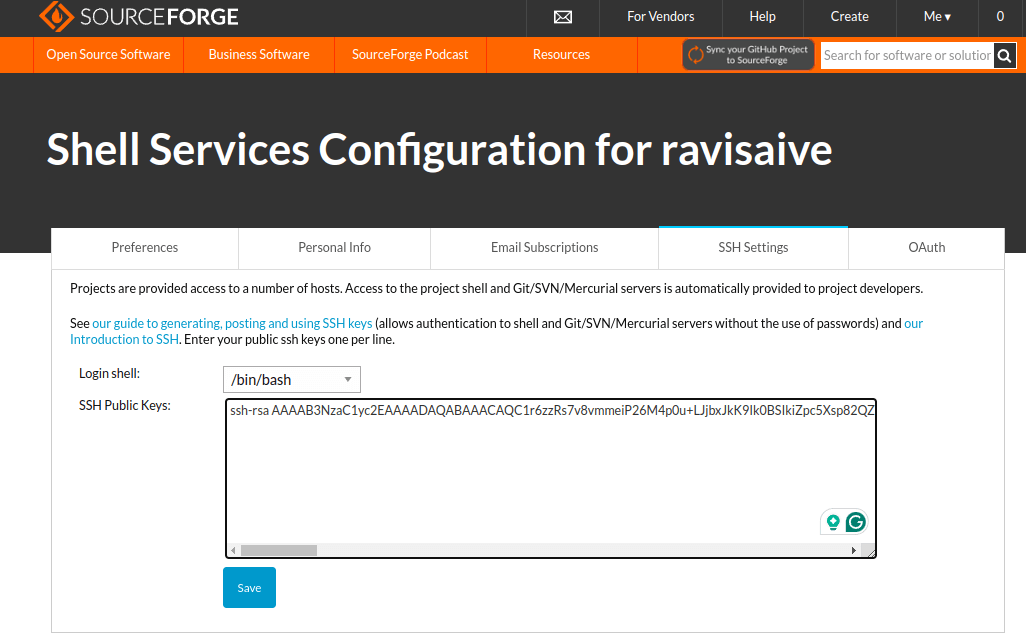
After generating the SSH key, copy the contents of your public key (~/.ssh/id_rsa.pub) and paste it into the SSH settings in SourceForge under My Account –> SSH Settings.
Step 2: Install Reprepro and Generate Key
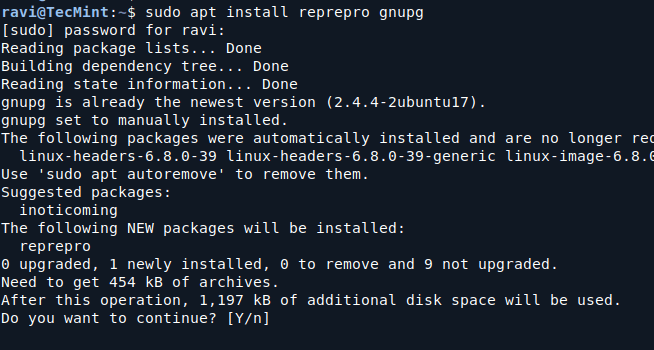
On your local system, install the Reprepro and gnupg packages by running the following command.
sudo apt update
sudo apt install reprepro gnupg
Now you need to generate a gpg key using the gnupg command.
gpg --gen-key
It will ask you some questions, like the kind of key you want, and how long the key should be valid, if you don’t know what to answer, just click Enter for the default options (recommended).
Of course, it will ask you for a username and a password, keep those in mind, because we will need them later.
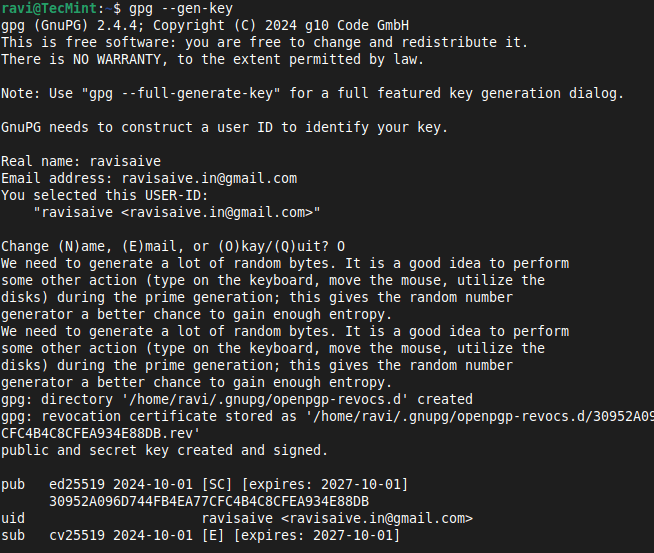
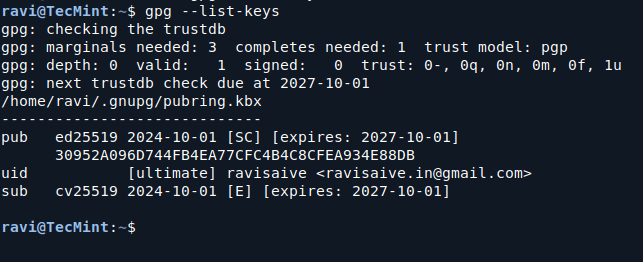
Once the key is generated, you can verify it by running the following command with root privileges.
sudo gpg --list-keys
Step 3: Create a Directory Structure for Repository
You need to create a directory structure to store your repository files. Let’s assume you’re setting up a repository for both Ubuntu and Debian packages. Create a directory and the necessary subdirectories:
mkdir -p ~/deb-repo/{conf,dists,incoming,pool}
Here’s what these directories are for:
- conf: This directory holds the configuration files for your repository.
- dists: Contains the distribution-specific files (like bionic, focal, etc.).
- incoming: Temporary folder for incoming packages.
- pool: Stores the actual package files.
Now, create a configuration file in the conf directory.
nano ~/deb-repo/conf/distributions
Add the following content:
Origin: Ravi Saive
Label: My Awesome Repo
Suite: stable
Codename: focal
Architectures: amd64 source
Components: main
Description: A repository of custom Debian packages for my projects
SignWith: yes
You can replace focal with the name of the Ubuntu or Debian distribution you’re targeting, like focal or bullseye. The SignWith option is used to sign your repository with a GPG key.
Next, create another configuration file called reprepro.conf.
nano ~/deb-repo/conf/reprepro.conf
Add the following lines to reprepro.conf.
verbose
basedir .
This file tells Reprepro where to find its files.
Step 4: Add Packages to the Newly Created Repository
Now it’s time to add Debian packages (.deb files) to your repository. You can either create your own packages or download existing ones.
For this example, let’s assume you have a package named fastfetch-linux-amd64.deb, let’s move this .deb package to the packages directory.
mv /home/ravi/fastfetch-linux-amd64.deb ~/mydebrepo/packages/
Now, you will add this package to your repository using the following command.
cd mydebrepo
reprepro -b . includedeb focal ~/mydebrepo/packages/fastfetch-linux-amd64.deb
Step 5: Publish Your Repository on Sourceforge
To upload the mydebrepo repository to Sourceforge.net, you need to have a running account there of course, and a running project, let’s assume that you want to upload the repository to http://sourceforge.net/projects/tecmint/ where tecmint is your project name, you can use the following rsync command.
rsync -avz -e "ssh" ~/mydebrepo [email protected]:/home/frs/project/tecmint/
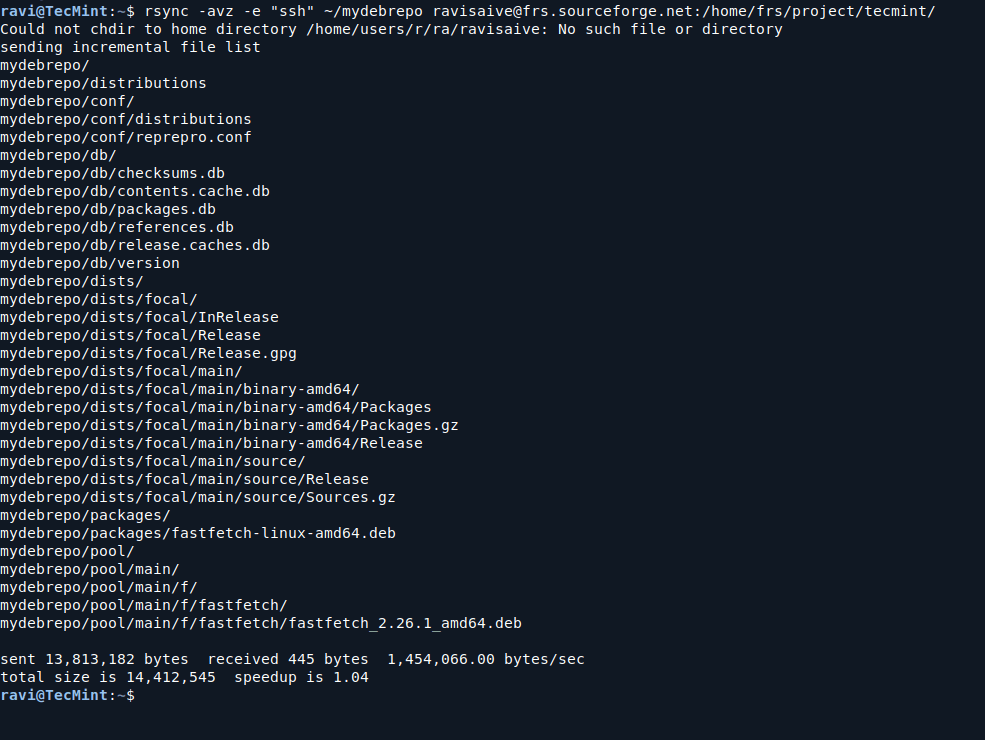
Make sure to replace your username with your username on sourceforge.net and tecmint with your project UNIX-name and mydebrepo with the folder you want to store the files in.
Step 6: Adding Your Repository to Client Machines
ow that your repository is set up, you can add it to client machines so users can download packages from it. On any Ubuntu machine where you want to use your repository, open the terminal and run:
echo "deb [trusted=yes] http://sourceforge.net/projects/tecmint/mydebrepo focal main" | sudo tee /etc/apt/sources.list.d/mydebrepo.list
Next, update the package list:
sudo apt update
Now your repository is ready to use! Users can install the packages you’ve added by using the standard apt install command.


![The Ultimate Ecommerce Holiday Planning Checklist [2024]](https://megazencarthosting.com/wp-content/uploads/2024/09/the-ultimate-ecommerce-holiday-planning-checklist-2024-768x403.webp)