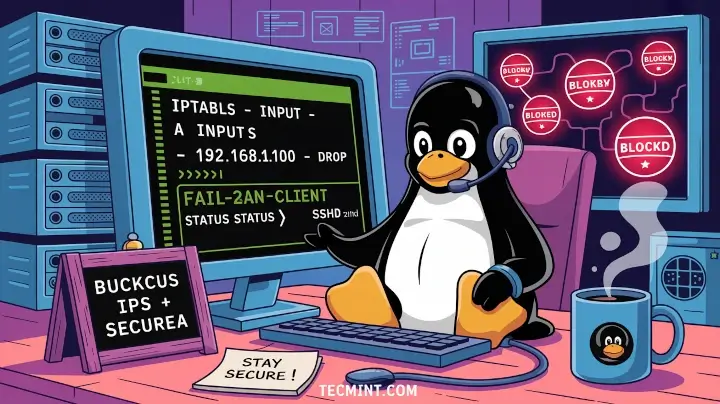
Today, I’m going to show you a simple but effective way to automatically block suspicious IPs using a small script and tools like iptables and Fail2Ban. These tools are powerful, lightweight, and can help secure your Linux server from brute-force attacks, bots, or any malicious traffic.
This guide is beginner-friendly and great for system administrators, students, or anyone who runs a VPS, web server, or even a home Linux server.
What are iptables and Fail2Ban?
Before we going further into the setup, let’s understand the two key tools we’re using – iptables and Fail2Ban.
iptables
iptables is a command-line firewall utility built into most Linux distributions, which works by applying a set of rules (called policy chains) to control network traffic.
These rules can filter packets based on the IP address, port number, or protocol. You can think of iptables as a gatekeeper standing at your server’s door, allowing only trusted traffic to enter while blocking the rest.
Fail2Ban
On the other hand, Fail2Ban is a log-monitoring tool that automatically detects and responds to malicious behavior. It watches log files in real time and looks for suspicious patterns like multiple failed login attempts.
When it finds something fishy, like a brute-force attack on your SSH, it steps in and bans the offending IP by adding a blocking rule in iptables. You can set how many failures to allow, how long to ban the IP, and even customize the response.
Used together, iptables and Fail2Ban offer a simple but powerful way to protect your server. While iptables acts as the firewall muscle, Fail2Ban adds brains by spotting threats and updating your firewall rules on the fly.
Why Use a Custom IP Blocker Script?
While Fail2Ban does an excellent job on its own by automatically banning suspicious IP addresses based on predefined log patterns, having a custom IP blocker script adds an extra layer of flexibility and control.
A custom script allows you to quickly add or remove IP addresses from your block list without modifying complex firewall rules directly. It also gives you the ability to build logic based on custom logs or triggers that Fail2Ban may not be monitoring.
For example, if you have a web application that writes its own logs, or a monitoring tool that detects specific patterns, you can easily tie those alerts into your script for automatic blocking.
Moreover, this script can be integrated into other automation tasks or server management tools, making it especially useful in larger environments or for sysadmins managing multiple servers.
Step 1: Installing iptables and Fail2Ban
Before we begin setting things up, let’s make sure both iptables and Fail2Ban are installed on your system. These tools are available in the default package repositories for most major Linux distributions, so the installation is straightforward.
If you’re using a Debian-based system like Ubuntu or Debian itself, start by updating your package list to make sure everything is up to date.
sudo apt update
Once the update is complete, install both iptables and fail2ban by running:
sudo apt install iptables fail2ban
For RPM-based systems, you can install both tools using the yum package manager.
sudo yum install iptables-services fail2ban
Once installation is complete, you’ll be ready to configure your firewall and set up automatic protection using Fail2Ban.
Step 2: Creating a Simple IP Blocker Script
Now that both iptables and Fail2Ban are installed, let’s create a simple bash script (block-ip.sh) that allows you to manually block any IP address using iptables.
sudo nano /usr/local/bin/block-ip.sh
Inside this file, paste the following code:
#!/bin/bash

if [ -z "$1" ]; then
  echo "Usage: $0 "
  exit 1
fi

IP=$1

# Check if IP is already blocked
if iptables -L INPUT -v -n | grep -q "$IP"; then
  echo "IP $IP is already blocked."
else
  iptables -A INPUT -s $IP -j DROP
  echo "IP $IP has been blocked."
fi
This script first checks if you’ve provided an IP address as an argument. If not, it prints a usage message and exits. If an IP is provided, it checks whether that IP is already blocked using iptables. If it’s not already in the firewall rules, it adds a new rule to drop all traffic from that IP address and confirms the action.
Once the script content is in place, press CTRL+O to save and CTRL+X to exit the editor. Now, make the script executable so it can be run directly from the command line:
sudo chmod +x /usr/local/bin/block-ip.sh
With the script ready, let’s test it by blocking a sample IP address. For example, to block the IP 192.168.1.100, run:
sudo /usr/local/bin/block-ip.sh 192.168.1.100
If everything is working correctly, you should see a message saying:
IP 192.168.1.100 has been blocked.
To confirm that the IP was actually blocked, you can view the current iptables rules by running:
sudo iptables -L -n -v
This script is very useful when you want to block IPs manually or from custom logs.
Step 3: Setting Up Fail2Ban with iptables
With iptables ready and our custom script in place, it’s time to configure Fail2Ban so it can automatically detect and block malicious IPs attempting to compromise services like SSH, Apache, or any other internet-facing application on your server.
Fail2Ban uses a concept called “jails“, which are simply configuration blocks designed to monitor specific services. Each jail tells Fail2Ban what logs to watch, what patterns to look for, and how to respond when an attack is detected.
To begin, we need to edit or create the jail.local file, which is where you define your custom settings without affecting the default configuration.
sudo nano /etc/fail2ban/jail.local
Paste the following block into the file:
[sshd]
enabled = true
port = ssh
filter = sshd
logpath = /var/log/auth.log
maxretry = 5
bantime = 3600
findtime = 600
Let’s break down what each of these options means:
enabled = true: This turns the jail on so it’s actively monitoring SSH.port = ssh: This tells Fail2Ban which port to monitor.filter = sshd: This specifies the filter used to detect login failures.logpath = /var/log/auth.log: This is the log file that Fail2Ban will scan for failed SSH login attempts.maxretry = 5: If an IP fails to log in 5 times within the time window, it will be banned.bantime = 3600: This sets the ban duration to 3600 seconds (1 hour).findtime = 600: This defines the time window (in seconds) during which the maxretry attempts are counted, in this case, 10 minutes.
If you’re running a CentOS or RHEL-based system, you’ll need to change the logpath to match where SSH logs are stored.
/var/log/secure
After saving the jail configuration file, restart the Fail2Ban service to apply the changes:
sudo systemctl restart fail2ban
To verify that your jail is working properly, use the following command to check the status of the SSH jail:
sudo fail2ban-client status sshd
This will show you how many IPs have been banned, how many total attempts have been detected, and whether the jail is active.
If you’d like to see which IPs are currently being blocked by iptables (including those banned by Fail2Ban), run:
sudo iptables -L -n
Finally, if you want to unban a specific IP address that was automatically blocked by Fail2Ban, you can manually remove it using the command below:
sudo fail2ban-client set sshd unbanip 192.168.1.100
Step 4: Combine Your Script with Fail2Ban (Optional)
By default, Fail2Ban uses its own internal actions to block IP addresses using iptables. However, if you’d prefer to have Fail2Ban call your custom IP blocker script instead, perhaps because you’ve added custom logic or logging, you can set up a custom Fail2Ban action.
To do this, you’ll first need to create a new action definition file.
sudo nano /etc/fail2ban/action.d/customblock.conf
In this file, paste the following configuration:
[Definition]
actionstart =
actionstop =
actioncheck =
actionban = /usr/local/bin/block-ip.sh
actionunban = iptables -D INPUT -s  -j DROP

[Init]
This configuration tells Fail2Ban to use your custom script whenever it needs to ban an IP address. The actionban line runs your script and passes the offending IP address to it. For unbanning, it directly removes the blocking rule from iptables.
Next, you need to tell Fail2Ban to use this custom action in your jail configuration.
sudo nano /etc/fail2ban/jail.local
Under your [sshd] jail or any other jail you’ve configured, update the action line to point to your custom action:
[sshd]
enabled = true
port = ssh
filter = sshd
logpath = /var/log/auth.log
maxretry = 5
bantime = 3600
findtime = 600
action = customblock
After making these changes, restart the Fail2Ban service to apply them:
sudo systemctl restart fail2ban
Now, whenever Fail2Ban detects a suspicious IP, it will call your script to handle the blocking, giving you the flexibility to log, alert, or perform additional actions if needed.
Saving iptables Rules
One important thing to note is that iptables rules are not persistent by default, which means any rules added, either manually or by Fail2Ban, will be lost after a server reboot unless you explicitly save them.
On Debian or Ubuntu systems, you can make firewall rules persistent by installing the iptables-persistent package:
sudo apt install iptables-persistent
Once installed, save your current rules with:
sudo netfilter-persistent save
On CentOS or RHEL, the process is slightly different, you can save your rules using the following service command:
sudo service iptables save
Alternatively, you can manually save the rules to the proper configuration file like this:
sudo iptables-save > /etc/sysconfig/iptables
By saving your rules, you ensure that IPs blocked manually or through Fail2Ban remain blocked even after the system restarts.
Conclusion
Securing your Linux server doesn’t have to be complicated. By combining the power of iptables with the intelligence of Fail2Ban, you can create a strong and flexible defense against brute-force attacks, unwanted login attempts, and suspicious IP activity.
While Fail2Ban automates the detection and banning process, a custom IP blocker script gives you manual control when you need it most.