If you’ve ever installed a fresh Ubuntu server and spent the next 20 minutes creating users, installing packages, configuring SSH keys, and adjusting networking manually, cloud-init can save yourself a lot of repetitive work.
Cloud-init is the initialization service used by most cloud platforms and virtual machine images. It reads configuration data during the first boot of a Linux system and automatically applies settings like hostname changes, user creation, SSH configuration, package installation, and startup commands.
Ubuntu cloud images already include cloud-init by default, but understanding how it works gives you much better control over automated server deployments. Once you get comfortable with it, spinning up new servers becomes far less repetitive.
What is cloud-init in Ubuntu 26.04?
cloud-init is a Linux initialization service that runs automatically during the very first boot of a new server instance, and its job is to configure the system before you ever log in.
It reads a configuration file called user-data, which contains instructions written in YAML format, and depending on your environment, this file can be provided in several ways:
- Through a cloud provider’s metadata service, such as DigitalOcean, AWS, Azure, or Google Cloud.
- Using a NoCloud datasource for local virtual machines.
- From a seed ISO image in lab or homelab setups.
Once the server starts, cloud-init reads the configuration and begins applying the tasks you defined, such as:
- Creating users
- Adding SSH keys
- Installing packages
- Setting hostnames
- Running startup commands
The cloud-init boot process is divided into five stages:
- Detect – Determines which datasource or platform the server is running on.
- Local – Performs early system setup tasks before networking is available.
- Network – Brings up networking and connects to the datasource.
- Config – Applies most of the configuration modules from your user-data file.
- Final – Runs the last setup tasks, including package installs and custom commands.
By the time the server finishes booting and you can SSH into it, where cloud-init has already completed all these stages and applied your configuration.
One important thing beginners should know is that cloud-init errors are not always obvious. A small YAML formatting mistake or invalid command may cause part of the configuration to fail quietly during boot. The server still starts, but some tasks may never run.
That’s why checking the cloud-init logs should always be your first troubleshooting step after deploying a new instance.
cloud-init actually does at boot, who’s still configuring servers by hand.Install cloud-init on Ubuntu 26.04
On official Ubuntu 26.04 cloud images, cloud-init is already installed and enabled by default. However, if you’re using a regular desktop installation, a bare-metal server, or a manually created local VM, you may need to install it yourself.
Start by checking whether cloud-init is already available on your system:
cloud-init --version
Output:
/usr/bin/cloud-init 26.1-0ubuntu2
If you see a version number, cloud-init is already installed and ready to use. If the command returns no output, install cloud-init using the following commands.
sudo apt update
sudo apt install cloud-init -y
Once the installation finishes, cloud-init is automatically configured and enabled to start during boot.
Check the cloud-init Status
Before creating or testing any configuration, it’s a good idea to verify that cloud-init is working properly on the current system.
cloud-init status
Output:
status: done
Here’s what the different status values mean:
status: done– cloud-init completed successfully during boot.status: running– cloud-init is still processing tasks in the background.status: error– Something failed during execution and needs troubleshooting.
If you see an error state, the first thing to check is the cloud-init log files:
sudo less /var/log/cloud-init.log
sudo less /var/log/cloud-init-output.log
These logs contain detailed information about package installations, user creation, YAML parsing errors, and startup commands that may have failed during boot.
For more detailed information, use the extended status command:
cloud-init status --long
Output:
status: done
extended_status: done
boot_status_code: enabled-by-generator
last_update: Thu, 01 Jan 1970 00:00:27 +0000
detail: DataSourceNoCloud [seed=/var/lib/cloud/seed/nocloud-net]
errors: []
recoverable_errors: {}
This output gives you a more detailed breakdown of how cloud-init initialized the system.
One important line here is:
detail: DataSourceNoCloud
This tells you which datasource cloud-init used to retrieve its configuration.
For example:
DataSourceNoCloudis commonly used for local VMs, lab environments, and ISO-based setups.DataSourceEc2is used on AWS EC2 or DigitalOcean instances.DataSourceAzureappears on Microsoft Azure.DataSourceOpenStackis commonly used on OpenStack-based clouds.
Knowing the active datasource helps a lot when troubleshooting why a user-data file was or wasn’t detected during boot.
Understand the cloud-init Directory Structure
Before creating your first cloud-init configuration, it helps to understand where the important files and logs are stored on Ubuntu.
Here are the main directories and files you’ll work with most often:
/etc/cloud/cloud.cfg– the main system config, controls which modules run and in which order./etc/cloud/cloud.cfg.d/– drop-in config overrides, loaded aftercloud.cfg./var/lib/cloud/– runtime data, including theuser-datacloud-init received on first boot./var/log/cloud-init.log– detailed per-module execution log./var/log/cloud-init-output.log– stdout/stderr from every commandcloud-initran.
In most cases, you won’t need to edit /etc/cloud/cloud.cfg directly, because the real configuration work usually happens inside the user-data YAML file you provide when creating the server instance.
You can also inspect the additional configuration files loaded by cloud-init:
ls -l /etc/cloud/cloud.cfg.d/
Output:
total 20
-rw-r--r-- 1 root root 2071 Aug 13  2025 05_logging.cfg
-rw-r--r-- 1 root root  348 May 27 11:54 90_dpkg.cfg
-rw-r--r-- 1 root root   28 May 27 13:16 99-disable-network-config.cfg
-rw-r--r-- 1 root root  167 Aug 13  2025 README
-rw-r--r-- 1 root root   35 May 27 10:30 curtin-preserve-sources.cfg
Some of these files are especially useful to know about:
05_logging.cfg– Controls wherecloud-initwrites its logs.90_dpkg.cfg– Added by Ubuntu’s package system and tellscloud-initto use apt for package management.99-disable-network-config.cfg– Preventscloud-initfrom modifying network settings, which is the default behavior on Ubuntu systems that use Netplan to manage networking.curtin-preserve-sources.cfg– Helps preserve APT repository settings during installations performed with Curtin, Ubuntu’s automated installer backend.
As you start troubleshooting or customizing cloud-init behavior, these directories become very useful for understanding what happened during boot and why a configuration did or didn’t apply correctly.
Write a User-Data Config File
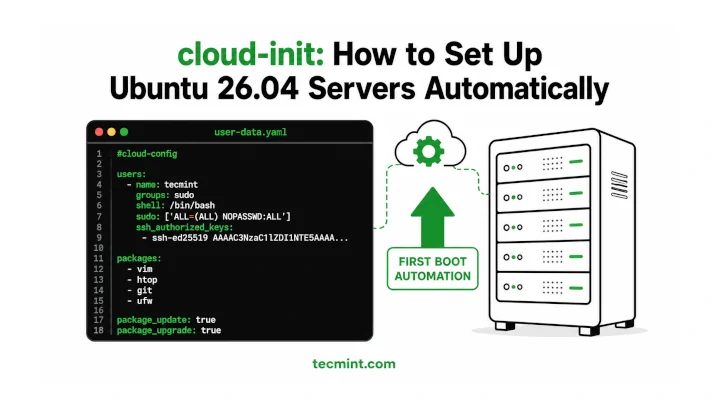
The user-data file is the heart of cloud-init, where you define everything the server should do automatically during its first boot.
The file must be written in YAML format and the very first line must contain the following header. If it’s missing, cloud-init treats the file as plain text and ignores the configuration completely.
#cloud-config
Now, create a new user-data file:
nano ~/user-data.yaml
Paste the following configuration into the file:
#cloud-config

# Create a new user with sudo access
users:
  - name: tecmint
    groups: sudo
    shell: /bin/bash
    sudo: ['ALL=(ALL) NOPASSWD:ALL']
    ssh_authorized_keys:
      - ssh-ed25519 AAAAC3NzaC1lZDI1NTE5AAAA <your-public-key>

# Install packages on first boot
packages:
  - vim
  - htop
  - git
  - ufw

package_update: true
package_upgrade: true

# Set the hostname
hostname: tecmint-server

# Write a custom motd
write_files:
  - path: /etc/motd
    content: |
      Welcome to TecMint Server
      Managed by cloud-init on Ubuntu 26.04

# Run commands after packages are installed
runcmd:
  - ufw allow OpenSSH
  - ufw --force enable
Replace <your-public-key> with the actual contents of your public SSH key file.
You can display your public key using:
cat ~/.ssh/id_ed25519.pub
Copy the entire output beginning with ssh-ed25519 and paste it into the YAML file.
ssh-ed25519 AAAAC3NzaC1lZDI1NTE5AAAAIBTvMBRGqRTCCjFEXvmD7TjJkwBpO3X8QZ9vYmK2sNpA ravi@tecmint-server
If you don’t have an ed25519 key yet, generate one first:
ssh-keygen -t ed25519 -C "ravi@tecmint-server"
Then run cat ~/.ssh/id_ed25519.pub again and you’ll have it.
Breaking down the key sections:
users– creates thetecmintuser, adds them tosudo, and injects the SSH key.packages– installs vim, htop, git, and ufw via apt.package_update: true– runsapt updatebefore installing.package_upgrade: true– runsapt upgradeto apply pending security patches.hostname– sets the system hostname so you’re not staring at a random cloud-generated name.write_files– drops arbitrary file content to any path on the filesystem.runcmd– runs shell commands in order, after all other modules finish.
Once this file is ready, you can pass it to a cloud provider or test it locally in a virtual machine using the NoCloud datasource.
Test the Config with cloud-init Schema Validation
Before using your user-data file on a real server, validate it with the built-in cloud-init schema checker, which is important because YAML formatting mistakes are very easy to miss. A single indentation error or invalid key can cause part of your configuration to fail silently during the first boot.
Run the validation command like this:
sudo cloud-init schema --config-file ~/user-data.yaml
If the configuration is valid, you’ll see output similar to this:
Valid cloud-config: /home/ravi/user-data.yaml
If there’s a problem, cloud-init points directly to the invalid section.
Error: cloud-config is not valid:
  - 'users.0.sudo' is not valid under any of the given schemas
This usually means:
- A key name is incorrect
- YAML indentation is broken
- A value format is invalid
- A section is placed in the wrong location
Fix every validation error before deploying the configuration to real systems.
Apply cloud-init Locally with NoCloud Datasource
On a local VM or a homelab server where you don’t have a cloud provider metadata service, you can test your user-data config using the NoCloud datasource, which is the cleanest way to iterate on configs without spinning up real cloud instances.
Create the seed directory structure:
sudo mkdir -p /var/lib/cloud/seed/nocloud-net
Copy your user-data file there:
sudo cp ~/user-data.yaml /var/lib/cloud/seed/nocloud-net/user-data
Create the required meta-data file, which can be empty, but it must exist:
sudo touch /var/lib/cloud/seed/nocloud-net/meta-data
Now clean the existing cloud-init state so it re-runs on the next boot:
sudo cloud-init clean --logs
This wipes the runtime state that tells cloud-init “I already ran on this system“. After this command, cloud-init will treat the next boot as a first boot and reprocess everything.
Important: cloud-init clean removes all state, including user-data that was applied before. On a production system, this triggers a full re-run, which can re-create users, reinstall packages, and overwrite files.
Reboot the machine:
sudo reboot
After the reboot, check the status:
cloud-init status --wait
Output:
.............................status: done
Check the output log to confirm your packages are installed:
sudo cat /var/log/cloud-init-output.log
Output:
Cloud-init v. 26.1-0ubuntu2 running 'init-local' at Fri, 29 May 2026 05:32:28 +0000. Up 3.72 seconds.
Cloud-init v. 26.1-0ubuntu2 running 'init' at Fri, 29 May 2026 05:32:29 +0000. Up 4.06 seconds.
ci-info: +++++++++++++++++++++++++++Net device info++++++++++++++++++++++++++++
ci-info: +--------+-------+-----------+-----------+-------+-------------------+
ci-info: | Device |   Up  |  Address  |    Mask   | Scope |     Hw-Address    |
ci-info: +--------+-------+-----------+-----------+-------+-------------------+
ci-info: | enp1s0 | False |     .     |     .     |   .   | 52:54:00:d4:f7:a2 |
ci-info: |   lo   |  True | 127.0.0.1 | 255.0.0.0 |  host |         .         |
ci-info: +--------+-------+-----------+-----------+-------+-------------------+
...
Cloud-init v. 26.1-0ubuntu2 running 'modules:config' at Fri, 29 May 2026 05:32:30 +0000. Up 5.85 seconds.
Cloud-init v. 26.1-0ubuntu2 running 'modules:final' at Fri, 29 May 2026 05:32:32 +0000. Up 7.93 seconds.
...
The following NEW packages will be installed:
  git git-man htop liberror-perl
0 upgraded, 4 newly installed, 0 to remove and 17 not upgraded.
Need to get 5,630 kB of archives.
After this operation, 28.8 MB of additional disk space will be used.
...
Setting up htop (3.4.1-5build2) ...
Setting up git (1:2.53.0-1ubuntu1) ...
Rules updated
Rules updated (v6)
Firewall is active and enabled on system startup
Cloud-init v. 26.1-0ubuntu2 finished at Fri, 29 May 2026 05:32:52 +0000. Datasource DataSourceNoCloud [seed=/var/lib/cloud/seed/nocloud-net].  Up 27.22 seconds
The log shows each package being pulled from the Ubuntu archive (resolute is Ubuntu 26.04’s archive codename), the runcmd entries firing the UFW rules, and finally the finished line confirming everything ran cleanly in 27 seconds.
Pass User-Data Through a Cloud Provider
When launching a real cloud instance, you pass the user-data file at creation time through your provider’s interface or CLI. The process is the same across providers, only the tooling differs.
On DigitalOcean:
In the Droplet creation UI, scroll to the “Advanced Options” section and check “Add Initialization scripts (free)“. Paste the contents of your user-data.yaml directly into the text field.
Using the DigitalOcean CLI (doctl):
doctl compute droplet create tecmint-server
  --image ubuntu-26-04-x64
  --size s-1vcpu-1gb
  --region nyc1
  --user-data-file ~/user-data.yaml
On AWS (EC2):
aws ec2 run-instances
  --image-id ami-0abcdef1234567890
  --instance-type t3.micro
  --user-data file://~/user-data.yaml
  --key-name my-keypair
The --user-data file:// prefix tells the AWS CLI to read the file from disk rather than expecting an inline string.
Debug cloud-init Failures
When something goes wrong, the 2 log files tell you everything:
sudo tail -50 /var/log/cloud-init.log
Output:
2026-05-29 05:32:55,321 - stages.py[DEBUG]: Running module package-update-upgrade-install ...
2026-05-29 05:32:55,004 - util.py[WARNING]: Failed to run command: ['apt', 'install', '-y', 'htop']
2026-05-29 05:32:55,005 - util.py[WARNING]: exit code: 100
The WARNING lines show you exactly which module failed and what command it tried to run and the exit code: 100 from apt means the package wasn’t found or the cache was stale, usually fixed by adding package_update: true to your config.
For a fast summary of what ran and what failed:
cloud-init analyze show
The analyze show output gives you a timeline of every module with how long each one took.
Conclusion
cloud-init takes the repetitive first-boot setup off your hands and puts it into a version-controllable YAML file. You covered how to install and verify cloud-init on Ubuntu 26.04, how to write a user-data config that creates users, installs packages, and runs commands, and how to test that config locally using the NoCloud datasource before pushing it to a real cloud instance.
Start with the schema validation step, cloud-init schema --config-file, before you deploy anything. Catching a YAML indentation error locally takes 2 seconds. Catching it after you’ve launched 20 instances takes much longer.
Have you run into a cloud-init issue that wasn’t obvious from the logs? Drop it in the comments and describe what your config was trying to do.