apt and dnf.The official makerskills install file was written for macOS, and it shows in every step. The dependency commands use brew, the transcription tool is mlx-whisper, which runs only on Apple Silicon, and the environment variables are exported to ~/.zshenv, a file most Linux users don’t normally have.
The makerskills plugin itself works fine on Linux. It’s simply a collection of Markdown skill files that Claude Code reads at runtime. There’s no compiled binary, macOS framework, or platform-specific code in the plugin. The problems are all in the dependencies around it.
So, installing it on Linux becomes a matter of translating those dependencies. You might see brew install yt-dlp ffmpeg pandoc and need to determine which packages are available in your distribution’s repositories.
On RHEL, you’ll also find that ffmpeg requires an additional repository. Then there’s uv tool install mlx-whisper, which is where things stop working because there’s no apt or dnf package for a framework designed specifically for Apple’s chips.
That’s where most people give up and close the tab. But you don’t need to. The commands below provide the Linux equivalent for each step in the original file, with a named replacement wherever the upstream tool has no Linux equivalent.
The setup was tested on Ubuntu 26.04 and RHEL 10, but the commands work on any modern Linux distribution.
What makerskills Actually Is
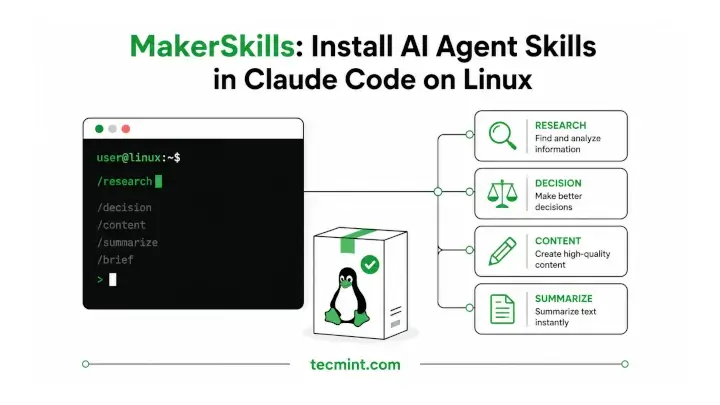
makerskills is a Claude Code plugin published by Corey Haines under the MIT license. It bundles a collection of skills, with each skill stored as a SKILL.md file that tells Claude how to handle a specific type of task.
For example, decide walks through a decision using the 37signals framework, deep-research performs multi-source research with citations, second-brain reads and writes to a Markdown vault, and read-book works through PDFs and EPUBs chapter by chapter.
A skill isn’t a binary that you run from the shell. It’s essentially a prompt file with structured instructions and a description that Claude matches against what you type. The whole thing runs inside a Claude Code session rather than being installed as a command under /usr/local/bin.
The README lists 15 skills, while the install file mentions 18 and includes a few that aren’t listed in the README, such as company-brain, company-cfo, and domain.
The install file is newer, so after installation, rely on the skills actually present on disk rather than the count listed in either document.
What You Need First
You need Claude Code installed and signed in, along with git and curl. Check what you already have:
claude --version
git --version
If claude isn’t found, install it through npm and then sign in using the browser flow. The plugin commands below need a reasonably recent version, so update it first if you’re using an older build.
npm install -g @anthropic-ai/claude-code
If git isn’t installed, install it with your package manager before continuing. Plugin sources in a marketplace are fetched using Git.
TecMint has a full walkthrough on Git basics if you’re setting it up for the first time.
Install makerskills as a Claude Code Plugin
Claude Code handles this in two steps. Adding a marketplace registers the catalog so Claude Code knows where to find the plugins. Installing the plugin then downloads the actual files.
Start a Claude Code session in any directory and run:
/plugin marketplace add coreyhaines31/makerskills
/plugin install makerskills@makerskills
The install command opens a details screen where you choose the installation scope. Pick user if you want the skills available across all your projects. That’s the better choice for skills like decide and read-book, which aren’t tied to the repository you’re currently working in.
Pay attention to the installation summary. If it ends with: Run /reload-plugins to activate run that command before testing the skills. Otherwise, they won’t be loaded into the Claude Code session you’re already using.
You can also install the plugin without opening an interactive session, which is useful when you’re setting up a new machine from a script:
claude plugin marketplace add coreyhaines31/makerskills
claude plugin install makerskills@makerskills
If you want to go deeper, the Claude Code for Linux Sysadmins course covers plugins, skills, and hooks from start to finish.
When the Clone Fails with Permission Denied (publickey)
GitHub’s owner/repo shorthand uses SSH by default. On a fresh Linux workstation without an SSH key loaded into ssh-agent, the clone fails immediately. The error can make it look like there’s a problem with the plugin when it’s actually an SSH authentication issue.
Force HTTPS instead:
export CLAUDE_CODE_PLUGIN_PREFER_HTTPS=1
Git operations have a 120-second timeout by default. On a slow connection, that may not be enough, and you’ll see Git clone timed out after 120s without much useful information about the repository. You can increase the timeout; the value is in milliseconds:
export CLAUDE_CODE_PLUGIN_GIT_TIMEOUT_MS=300000
Set the Environment Variables in Bash
The upstream documentation tells you to put these variables in ~/.zshenv. On most Linux systems, you’re using Bash, so put them in ~/.bashrc instead.
MAKERSKILLS_CONFIG has a sensible default that works as-is. The other variables point to directories you choose.
export MAKERSKILLS_CONFIG="$HOME/.config/makerskills"
export SECOND_BRAIN_VAULT="$HOME/Documents/SecondBrain"
export COMPANY_BRAIN_VAULT="$HOME/Documents/CompanyBrain"
export COMPANY_CFO_ROOT="$HOME/code/company-cfo"
export SLIDE_DECK_REPO="$HOME/code/"
Anything inside angle brackets is a placeholder that you need to replace with your own value. For example, should become the actual name of your site directory.
Reload the file so the current shell picks up the variables:
source ~/.bashrc
Next, create the configuration directories used by the skills. These directories hold your actual data, which is why makerskills keeps them outside the repository:
mkdir -p ~/.config/makerskills/{jab-hook,pm,decide,business-brainstorm,deep-research,personal-cfo,slide-deck}
The brace expansion at the end creates all seven subdirectories in one command:
mkdircreates the directories.-pcreates parent directories as needed and doesn’t complain if they already exist.{jab-hook,pm,...}expands into seven separate paths, so Bash treats it as if you had typed each path separately.
Install the Runtime Dependencies on Linux
The skills call real command-line tools. watch-video needs yt-dlp and ffmpeg, read-book needs pandoc and Calibre’s ebook-convert, and domain needs whois.
Install only the dependencies for the skills you actually plan to use.
On Ubuntu/Debian:
sudo apt update
sudo apt install ffmpeg pandoc git-filter-repo calibre whois -y
sudo runs the command with root privileges, which package installation needs because it writes to system directories. If you get a Permission denied error, check that you included sudo.
On RHEL/Rocky Linux:
sudo dnf install https://mirrors.rpmfusion.org/free/el/rpmfusion-free-release-$(rpm -E %rhel).noarch.rpm -y
sudo dnf install ffmpeg pandoc git-filter-repo calibre whois -y
ffmpeg isn’t available in the default RHEL repositories, which is why the RPM Fusion release package is installed first. You don’t need that extra step on Ubuntu, where ffmpeg is available in the main repositories.
The yt-dlp package in distribution repositories can lag behind upstream releases, and an outdated version can stop working when YouTube changes. Install the Python tool runner and get the current version through it:
curl -LsSf https://astral.sh/uv/install.sh | sh
uv tool install yt-dlp
The Whisper Substitution
The upstream instructions install mlx-whisper for transcription. MLX is Apple’s framework for Apple Silicon, so there isn’t a Linux equivalent of that package.
Instead, use the reference implementation, which runs on the CPU and can use CUDA when available:
uv tool install openai-whisper
If you’re on a laptop without a GPU and the reference model is too slow, whisper.cpp compiled locally provides a faster CPU option, but it requires an additional build step.
For the PDF rendering used by read-book and second-brain, the Mac instructions install BasicTeX. On Ubuntu/Debian, use: sudo apt install texlive-latex-recommended texlive-fonts-recommended, and on RHEL/Rocky Linux it’s sudo dnf install texlive-scheme-basic.
Run Your First Skill
Open Claude Code and type a skill name as a slash command. decide is a good one to start with because it doesn’t need any configuration or API keys:
/decide
Claude Code should respond by asking for the decision context. If the short name doesn’t resolve, use the namespaced version instead. Claude Code prefixes plugin skills with the plugin name to prevent two plugins from using the same command name:
/makerskills:decide
Now check how many skills were actually installed. Plugins are copied into a versioned cache under your home directory rather than staying in the directory you cloned:
find ~/.claude/plugins/cache -name "SKILL.md" | wc -l
Here’s what the command does:
find ~/.claude/plugins/cachesearches through the plugin cache directory.-name "SKILL.md"matches only files with that exact name. Each skill has one SKILL.md file.|passes the output to the next command.wc -lcounts the lines, giving you the number of skills found.
The number you get is the actual skill count on your system, so it’s more reliable than the number listed in the README or install file. Each skill also has its own SKILL.md. You can open those files directly to see what a skill expects before you run it.
Where Your Personal Data Lives
Nothing you configure is pushed into the repository. Personal configuration lives in ~/.config/makerskills//, while generated output is stored under ~/Documents//. Both locations sit outside the repo and are gitignored by design.
This separation also makes moving to a new machine straightforward. Copy ~/.config/makerskills/ and the export lines from your ~/.bashrc to the new machine, reinstall the plugin, and you should be back where you left off.
A few skills support optional API keys for services such as Notion, Typefully, and Brave Search. These skills still work without API keys by using free fallbacks, so you can treat the API key list as something to revisit later rather than a required installation step.
Conclusion
You’ve installed makerskills as a Claude Code plugin, pointed its environment variables to Linux paths in ~/.bashrc instead of ~/.zshenv, replaced the Homebrew dependencies with apt and dnf packages, and swapped the Apple Silicon transcription tool for one that works on your hardware.
The plugin itself was never the Mac-specific part. The dependency chain around it was. Now run the find command against your plugin cache and open one of the SKILL.md files it finds.
Reading how a skill is structured is the quickest way to decide whether you want to use it as-is or fork it into your own namespace with adapt-skill.
Which skill are you planning to run first? And did you encounter a dependency that doesn’t have a clean Linux equivalent on your distro? Drop it in the comments, and I’ll take a look.