Managing a web server through command-line alone can feel like you’re juggling too many things at once. You need to configure Apache or Nginx, set up databases, manage SSL certificates, monitor resource usage, and handle file permissions, all while remembering the exact syntax for each operation.
A hosting control panel solves this by giving you a visual interface for all these tasks. Instead of memorizing commands and editing configuration files manually, you get a dashboard where you can click, configure, and deploy with confidence.
aaPanel is a free, lightweight control panel that handles this job remarkably well. It’s the international version of BT Panel, one of China’s most popular server management tools, and it brings that same simplicity to English-speaking users. You get one-click installations for web servers, databases, PHP versions, and security tools, all through a clean web interface that doesn’t overwhelm you with options you’ll never use.
But here’s the thing: while aaPanel makes server management easier, the initial installation still requires some command-line work to get everything up and running properly, that’s what we’ll walk through in this guide.
We’ll set up aaPanel on a fresh Ubuntu 24.04 server, configure the firewall correctly, and get you logged into the web interface where you can start managing your hosting environment without touching the terminal again unless you want to.
Prerequisites
Before we start, you’ll need a few things in place:
- A server running Ubuntu 24.04 (a VPS from providers like DigitalOcean, Linode, or AWS works perfectly).
- Root access or a user account with sudo privileges.
- At least 512MB of RAM (1GB or more recommended for better performance).
- A stable internet connection for downloading packages.
Step 1: Update Ubuntu System
First, let’s make sure your Ubuntu system has all the latest packages, which prevents compatibility issues and ensures you’re starting with a clean slate.
sudo apt update && sudo apt upgrade -y
The above command does two things: it updates the package list to see what’s available, then upgrades any installed packages to their newest versions. The -y flag automatically answers “yes” to any prompts, so you don’t have to babysit the process.
Step 2: Install aaPanel on Ubuntu
aaPanel provides an installation script that checks your system, installs dependencies, sets up the panel, and generates your login credentials, all in one go.
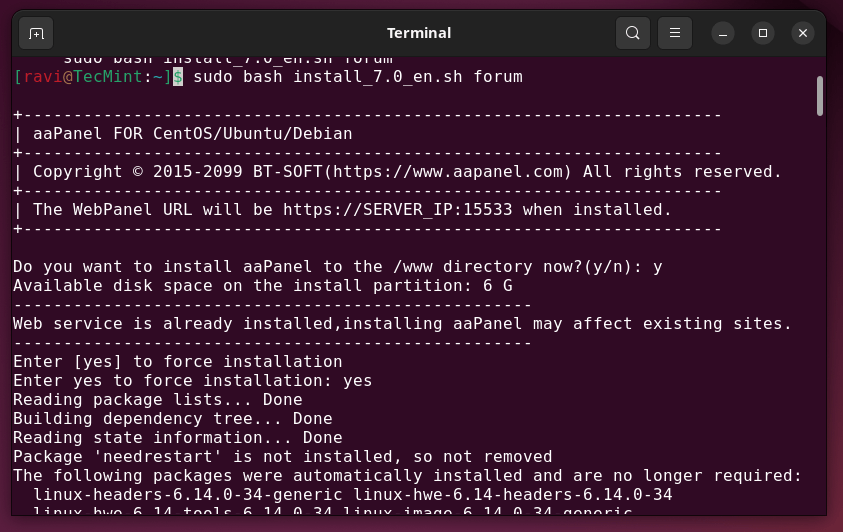
URL=https://www.aapanel.com/script/install_7.0_en.sh && if [ -f /usr/bin/curl ];then curl -ksSO "$URL" ;else wget --no-check-certificate -O install_7.0_en.sh "$URL";fi;bash install_7.0_en.sh aapanel
The installation takes about 5-10 minutes, depending on your server’s speed and internet connection. You’ll see various packages being installed, services being configured, and security settings being applied.
When the installation completes, you’ll see something that looks like this:
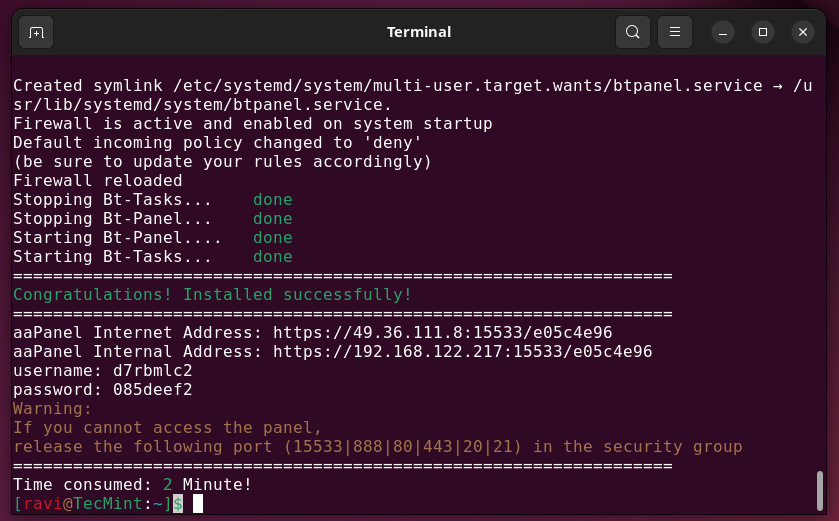
Important: Do remember to save these login credentials, you need them later, and that random string in the URL (e05c4e96 in this example) is a security token that prevents unauthorized access to your panel.
The external address is what you’ll use to access aaPanel from anywhere on the internet, while the internal address only works if you’re on the same local network as your server.
Step 3: Open aaPanel Port on Firewall
aaPanel runs on port 7800 by default, but depending on your server setup, this port might be blocked by the firewall. Let’s make sure it’s accessible.
If you’re using UFW (Ubuntu’s default firewall):
sudo ufw allow 7800/tcp
sudo ufw reload
If you’re running your server on a cloud provider like AWS, DigitalOcean, or Linode, you’ll also need to add a firewall rule in their web console to allow traffic on port 7800.
Step 4: Access the aaPanel Web Interface
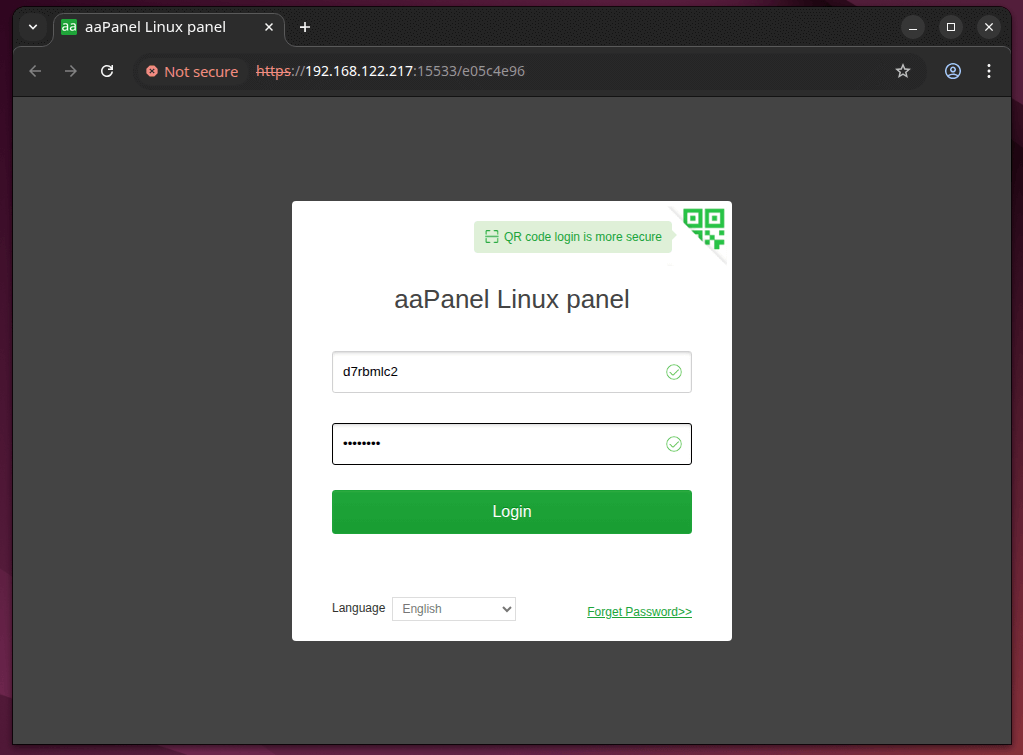
Open your web browser and navigate to the URL provided during installation:
http://your-server-ip:7800/e05c4e96
Replace your-server-ip with your actual server’s IP address, and use the exact security token from your installation output. You’ll see a login screen, enter the username and password that were generated during installation.
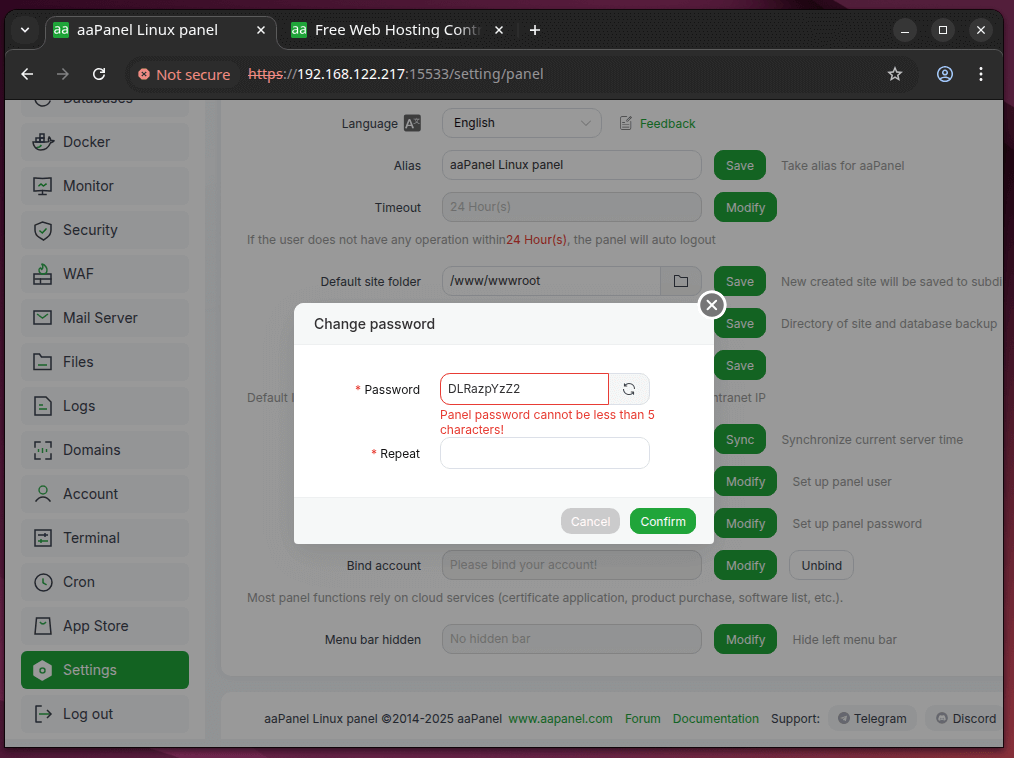
Security Tip: The first thing you should do after logging in is change your password to something only you know and you can do this from the panel settings.
Step 5: Complete Initial Setup
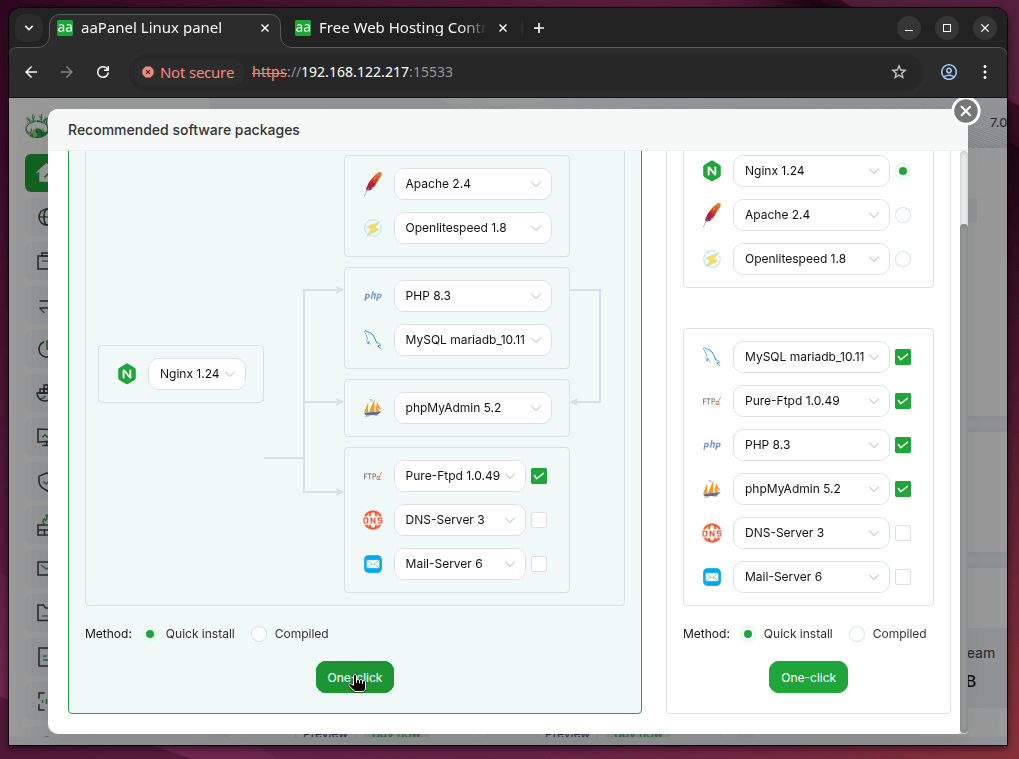
Once you’re logged in, aaPanel will recommend installing a LAMP or LNMP stack (Linux + Apache/Nginx + MySQL + PHP), which gives you everything you need to host websites.
You’ll see options like:
- LNMP (Nginx + MySQL + PHP) – faster for static content, better for high-traffic sites.
- LAMP (Apache + MySQL + PHP) – more compatible with certain applications, easier
.htaccessconfiguration.
Choose based on your needs. If you’re not sure, LNMP is generally the better choice for modern web applications, so select your preferred versions for each component (the panel will suggest stable versions), then click “One-click Install” and let aaPanel handle the rest.
What You Can Do Now with aaPanel
With aaPanel installed and your web stack ready, you can:
- Create websites with automatic Nginx/Apache configuration.
- Install SSL certificates with one-click Let’s Encrypt integration.
- Manage MySQL databases through phpMyAdmin.
- Upload files via the built-in file manager.
- Monitor server resources (CPU, memory, disk usage) in real-time.
- Set up automated backups to local storage or cloud providers.
- Install additional software like Redis, Memcached, or Node.js through the App Store.
All of this happens through the web interface, no command-line required unless you want that level of control.
aaPanel Security Recommendations
Before you start hosting anything important, take a few minutes to secure your panel:
- Change the default port – Go to Panel Settings and change port 7800 to something less obvious.
- Enable two-factor authentication – This adds an extra layer of protection to your login.
- Set up SSL for the panel itself – This encrypts your connection to aaPanel’s interface.
- Configure automated updates – Keep your software stack patched against vulnerabilities.
- Review the security settings – aaPanel includes a security scan tool that checks for common misconfigurations.
The panel makes all of these changes easy to implement, you don’t need to be a security expert to have a properly hardened server.
Managing aaPanel from the Command Line
While the web interface handles most tasks, sometimes you need to manage aaPanel itself from the terminal, maybe the web interface isn’t loading, you need to restart services, or you want to check system status quickly through SSH.
aaPanel includes a command-line management script that gives you control over the panel’s core functions, which is simple, straightforward, and doesn’t require you to remember complex commands.
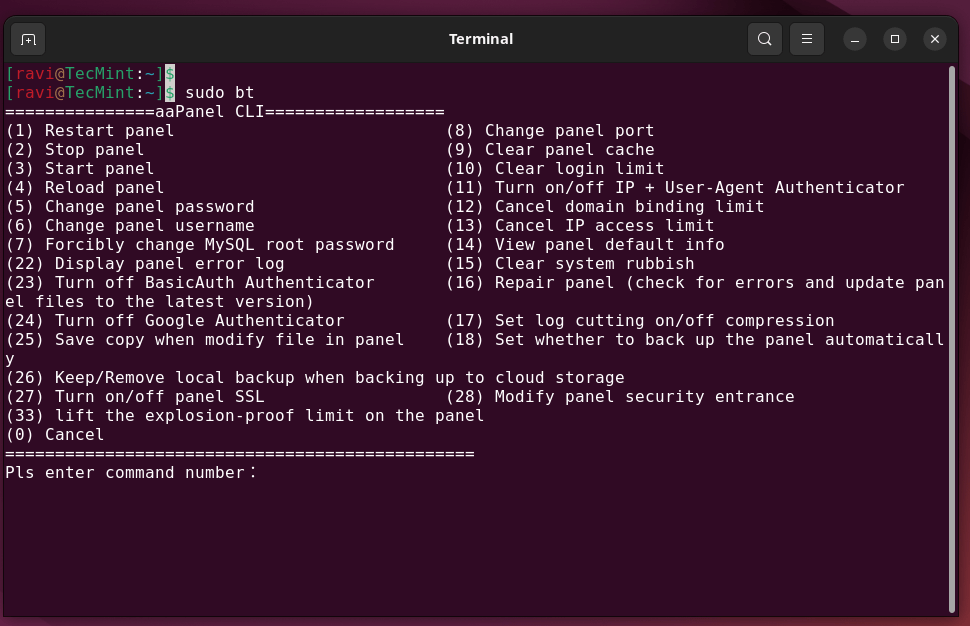
To open aaPanel’s management toolbox, just run:
bt
That’s it. Two letters, and you get an interactive menu with numbered options for everything from changing your password to viewing system information. It’s the kind of thoughtful touch that makes server management less tedious, when you need to do something quickly, you don’t have to dig through documentation.
Sometimes you need direct control over the aaPanel service itself.
service bt stop          #Stop the panel
service bt start         #Start the panel
service bt restart       #Restart the panel
Final Thoughts
aaPanel turns complex server management into a simple, beginner-friendly experience. Once installed, it gives you a clean web dashboard for deploying websites, managing databases, configuring security, and monitoring your server without relying on constant command-line work.