WireGuard is a modern VPN protocol built directly into the Linux kernel since version 5.6, and this guide walks through the full server and client setup on Debian 13 (Trixie) using nothing but the standard package manager and a handful of config files.
Most sysadmins still reach for OpenVPN out of habit, but these days that often means accepting a slower tunnel, managing a certificate authority, and dealing with a config file that can run to 50 lines before you’ve done anything meaningful.
WireGuard does the same job with just two config files, a key pair on each side, and a tunnel that comes up in under a second. The trade-off is that WireGuard runs only over UDP, so if your network actively blocks UDP traffic or you need to disguise it as HTTPS, then OpenVPN over TCP port 443 is still the better choice.
For everything else, WireGuard is the setup you want today, because it is simpler, faster, and significantly easier to install, config and maintain.
Every command below was tested on Debian 13 (Trixie) with WireGuard 1.0.0 and Linux kernel 6.12. The server uses a 10.0.0.0/24 VPN subnet and a single public network interface, but you can adjust both to fit your environment.
Install WireGuard on Debian 13
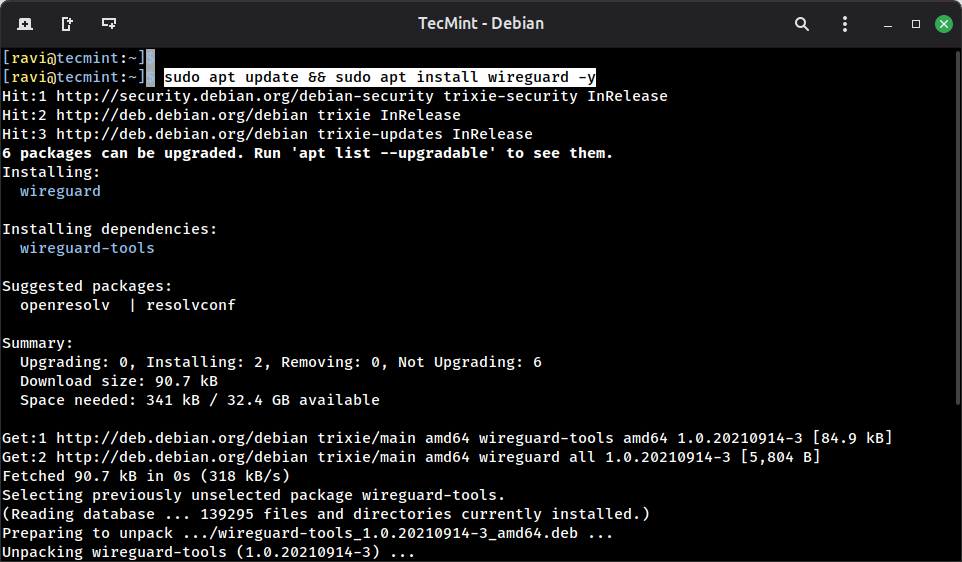
On Debian 13, WireGuard is available in the main repository, so there’s no need to add extra sources, just update your package lists and install it on the server.
sudo apt update && sudo apt install wireguard -y
The sudo prefix runs the command with root privileges, which is required for anything that touches system files, installs packages, or changes services. If you see Permission denied, you forgot the sudo prefix or your user is not in the sudo group.
After installation, confirm the installation and check that the kernel module loaded cleanly:
sudo modprobe wireguard
lsmod | grep wireguard

If modprobe returns an error like Module wireguard not found, your kernel headers may be missing, so install them with first and then retry:
sudo apt install linux-headers-$(uname -r)
Generate WireGuard Server Key Pair
WireGuard uses public/private key pairs for authentication instead of certificates. Each peer, whether server or client, generates its own key pair, and peers exchange only their public keys. The private key never leaves the machine it was generated on.
Generate the server key pair and save it to the WireGuard config directory:
sudo mkdir -p /etc/wireguard
sudo chmod 700 /etc/wireguard
wg genkey | sudo tee /etc/wireguard/server_private.key > /dev/null
sudo sh -c 'wg pubkey < /etc/wireguard/server_private.key' | sudo tee /etc/wireguard/server_public.key > /dev/null
The two commands are kept separate because the private key file is owned by root after sudo tee writes it, and a plain bash < redirection cannot read a root-owned 600 file as a regular user.
Wrapping the second command in sudo sh -c runs the entire redirection as root, which solves that. The > /dev/null on each line suppresses the keys from printing to the terminal.
Next, verify that both files were written correctly:
sudo cat /etc/wireguard/server_private.key
sudo cat /etc/wireguard/server_public.key
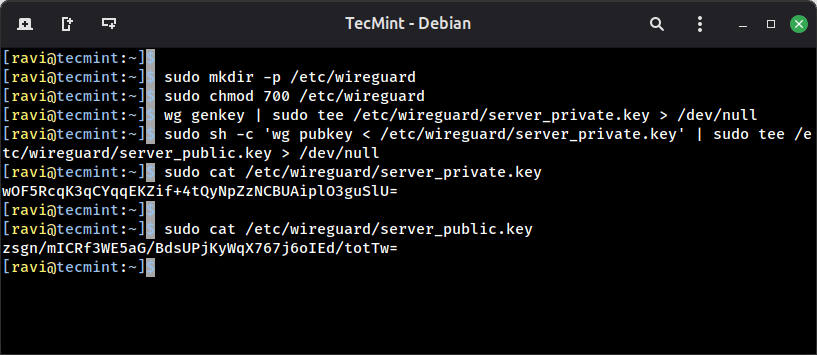
Both should return a single base64 string on one line. If either file is empty, rerun that specific command before continuing.
Lock down the private key so only root can read it:
sudo chmod 600 /etc/wireguard/server_private.key
server_private.key. If it leaks, anyone can impersonate your server. The public key is safe to share freely with any peer that needs to connect.Read the private key value so you can paste it into the config file in the next step:
sudo cat /etc/wireguard/server_private.key
Output:
wOF5RcqK3qCYqqEKZif+4tQyNpZzNCBUAiplO3guSlU=
Configure the WireGuard Server in Debian 13
Create the server configuration file at /etc/wireguard/wg0.conf, which defines the name of the virtual network interface WireGuard will create.
sudo nano /etc/wireguard/wg0.conf
Add the following, replacing server-private-key with the actual value from server_private.key and eth0 with your server’s actual public network interface name, which you can find with:
ip a
Now add the following lines to wg0.conf file.
[Interface]
Address = 10.0.0.1/24
ListenPort = 51820
PrivateKey = server-private-key
PostUp = iptables -A FORWARD -i wg0 -j ACCEPT; iptables -t nat -A POSTROUTING -o eth0 -j MASQUERADE
PostDown = iptables -D FORWARD -i wg0 -j ACCEPT; iptables -t nat -D POSTROUTING -o eth0 -j MASQUERADE
Here is what each directive does:
Address = 10.0.0.1/24assigns the server’s IP inside the VPN subnet, and every client will get an address in the same10.0.0.0/24range.ListenPort = 51820is the UDP port WireGuard listens on, which is the standard default.PrivateKeyis the server’s private key used to authenticate itself to connecting peers.PostUpruns these iptables commands when the interface comes up, enabling packet forwarding and NAT masquerade so VPN clients can reach the internet through the server.PostDowntears down the same rules cleanly when the interface goes down.
Save and close the file, then lock it down:
sudo chmod 600 /etc/wireguard/wg0.conf
Enable IP Forwarding for WireGuard
For the server to route client traffic to the internet, the Linux kernel needs IP forwarding enabled. Without it, packets from VPN clients arrive at the server’s wg0 interface and stop there.
sudo nano /etc/sysctl.conf
Find and uncomment this line:
net.ipv4.ip_forward=1
Apply it immediately without a reboot:
sudo sysctl -p
Output:
net.ipv4.ip_forward = 1
If you also want IPv6 forwarding, uncomment net.ipv6.conf.all.forwarding=1 in the same file.
Start the WireGuard Server
Bring up the WireGuard interface and enable it to start automatically on boot:
sudo systemctl start wg-quick@wg0
sudo systemctl enable wg-quick@wg0
Check that it came up cleanly:
sudo systemctl status wg-quick@wg0
Output:
● [email protected] - WireGuard via wg-quick(8) for wg0
     Loaded: loaded (/usr/lib/systemd/system/[email protected]; enabled; preset: enabled)
     Active: active (exited) since Tue 2026-04-28 07:13:32 EDT; 1min 2s ago
 Invocation: 202a03eee5b7429a90bd3644a3af127e
       Docs: man:wg-quick(8)
             man:wg(8)
             https://www.wireguard.com/
             https://www.wireguard.com/quickstart/
             https://git.zx2c4.com/wireguard-tools/about/src/man/wg-quick.8
             https://git.zx2c4.com/wireguard-tools/about/src/man/wg.8
    Process: 5805 ExecStart=/usr/bin/wg-quick up wg0 (code=exited, status=0/SUCCESS)
   Main PID: 5805 (code=exited, status=0/SUCCESS)
   Mem peak: 3.7M
        CPU: 56ms
The status shows active (exited) rather than active (running) because wg-quick is a oneshot service that sets up the interface and exits. The interface itself stays up.
Confirm it with:
sudo wg show
Output:
interface: wg0
  public key: zsgn/mICRf3WE5aG/BdsUPjKyWqX767j6oIEd/totTw=
  private key: (hidden)
  listening port: 51820
If wg show returns nothing, the interface did not come up, so you need to check the journal with the following command to find the exact error.
sudo journalctl -u wg-quick@wg0 -n 30 --no-pager
The most common causes are a wrong interface name in PostUp, a missing private key value, or a syntax error in wg0.conf.
Set Up WireGuard Client and Generate Keys
On the client machine (I am using Ubuntu 26.04), install WireGuard the same way:
sudo apt update && sudo apt install wireguard -y
Generate the client key pair using the same two-command pattern:
sudo mkdir -p /etc/wireguard
sudo chmod 700 /etc/wireguard
wg genkey | sudo tee /etc/wireguard/client_private.key > /dev/null
sudo sh -c 'wg pubkey < /etc/wireguard/client_private.key' | sudo tee /etc/wireguard/client_public.key > /dev/null
sudo chmod 600 /etc/wireguard/client_private.key
Verify both files were written correctly:
sudo cat /etc/wireguard/client_private.key
sudo cat /etc/wireguard/client_public.key
Both should return a single base64 string on one line. If either file is empty, rerun that specific command before continuing.
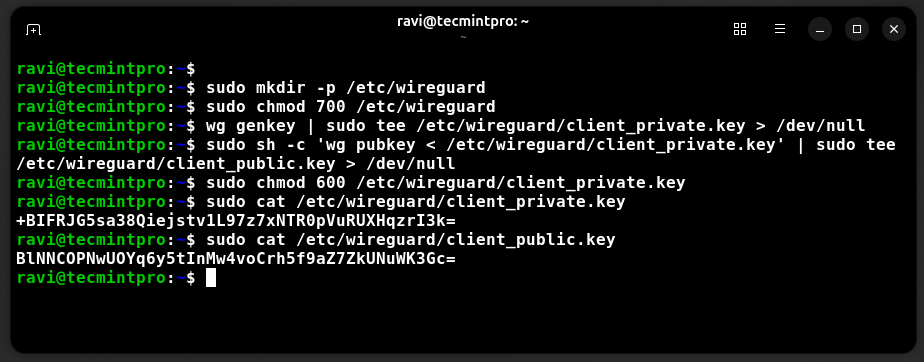
Read the client private key value so you can paste it into the config file:
sudo cat /etc/wireguard/client_private.key
Output:
+BIFRJG5sa38Qiejstv1L97z7xNTR0pVuRUXHqzrI3k=
Create the client configuration file:
sudo nano /etc/wireguard/wg0.conf
Add the following, replacing the placeholder values with your actual keys and server IP. Replace client-private-key with the value from the client’s client_private.key, server-public-key with the value from the server’s server_public.key, and server-ip with your server’s public IP address, which you can find on the server with:
curl -s ifconfig.me
Add the following lines to wg0.conf file.
[Interface]
Address = 10.0.0.2/24
PrivateKey = client-private-key
DNS = 8.8.8.8

[Peer]
PublicKey = server-public-key
Endpoint = server-ip:51820
AllowedIPs = 0.0.0.0/0
PersistentKeepalive = 25
Here is what each directive does:
Address = 10.0.0.2/24gives the client its IP inside the VPN subnet, each additional client gets the next address like10.0.0.3,10.0.0.4, and so on.DNS = 8.8.8.8tells the client to use Google’s DNS resolver while the tunnel is active, preventing DNS leaks.PublicKey under [Peer]is the server’s public key, this is how the client verifies it’s talking to the right server.Endpointis the server’s public IP and the WireGuard port.AllowedIPs = 0.0.0.0/0routes all traffic through the tunnel, for split tunneling where only specific subnets go through the VPN, replace this with those subnet ranges.PersistentKeepalive = 25sends a keepalive packet every 25 seconds to keep the tunnel alive through NAT routers and firewalls that drop idle UDP connections.
Lock down the client config:
sudo chmod 600 /etc/wireguard/wg0.conf
Tip: For each new client you add, generate a fresh key pair on that client machine and add a new [Peer] block to the server config. Never reuse key pairs across clients since separate keys let you revoke one client’s access without touching the others.
Add the Client as a Peer on the Server
Back on the server, add the client’s public key to the server config.
sudo nano /etc/wireguard/wg0.conf
Append a [Peer] block at the bottom and make sure to replace client-public-key with the value from the client’s client_public.key.
[Peer]
PublicKey = client-public-key
AllowedIPs = 10.0.0.2/32
Apply the new peer without restarting the interface, which would drop all active connections:
sudo wg addconf wg0 <(sudo wg-quick strip wg0)
Or reload cleanly with:
sudo systemctl restart wg-quick@wg0
Confirm the peer registered:
sudo wg show
Output:
interface: wg0
  public key: zsgn/mICRf3WE5aG/BdsUPjKyWqX767j6oIEd/totTw=
  private key: (hidden)
  listening port: 51820

peer: BlNNCOPNwUOYq6y5tInMw4voCrh5f9aZ7ZkUNuWK3Gc=
  allowed ips: 10.0.0.2/32
The peer entry appearing under wg show confirms the server knows about this client. It does not show a handshake yet because the client has not connected.
Connect the Client and Verify the Tunnel
On the client machine, bring up the WireGuard interface:
sudo systemctl start wg-quick@wg0
sudo systemctl enable wg-quick@wg0
Check the connection status:
sudo wg show
Output:
interface: wg0
  public key: BlNNCOPNwUOYq6y5tInMw4voCrh5f9aZ7ZkUNuWK3Gc=
  private key: (hidden)
  listening port: 47438
  fwmark: 0xca6c

peer: zsgn/mICRf3WE5aG/BdsUPjKyWqX767j6oIEd/totTw=
  endpoint: 192.168.122.211:51820
  allowed ips: 0.0.0.0/0
  latest handshake: 32 seconds ago
  transfer: 1.81 KiB received, 1.86 KiB sent
  persistent keepalive: every 25 seconds
The latest handshake line is the key indicator. If it shows a time value, the tunnel is up and both sides have verified each other’s keys. If it shows nothing, the handshake has not completed yet.
Verify end-to-end connectivity by pinging the server’s VPN IP from the client:
ping 10.0.0.1
Output:
PING 10.0.0.1 (10.0.0.1) 56(84) bytes of data.
64 bytes from 10.0.0.1: icmp_seq=1 ttl=64 time=0.958 ms
64 bytes from 10.0.0.1: icmp_seq=2 ttl=64 time=1.75 ms
64 bytes from 10.0.0.1: icmp_seq=3 ttl=64 time=2.85 ms
64 bytes from 10.0.0.1: icmp_seq=4 ttl=64 time=0.796 ms
^C
--- 10.0.0.1 ping statistics ---
4 packets transmitted, 4 received, 0% packet loss, time 3004ms
rtt min/avg/max/mdev = 0.796/1.588/2.854/0.814 ms
Confirm your traffic is actually leaving through the VPN by checking your public IP from the client:
curl -s ifconfig.me
The IP returned should match your VPN server’s public IP, not your client’s local ISP address. If it still shows your local IP, check that AllowedIPs = 0.0.0.0/0 is set in the client config and that IP forwarding and NAT masquerade are active on the server with:
sudo wg show
sudo iptables -t nat -L -n -v
Note: If the handshake never completes, the most common causes are a firewall blocking UDP port 51820 on the server, a wrong server public key in the client config, or a wrong client public key in the server’s [Peer] block. Double-check all three before digging deeper.
Add More Clients to WireGuard
For every additional client, the process is the same three steps.
- Generate a key pair on the new client.
- create a
wg0.confon that client with a unique Address like10.0.0.3/24. - add a new
[Peer]block to the server config pointing to that client’s public key withAllowedIPs = 10.0.0.3/32.
Each client gets its own key pair and its own IP. Removing a client later is as simple as deleting its [Peer] block from the server config and reloading with:
sudo systemctl restart wg-quick@wg0
There are no certificates to revoke and no CA to maintain.
Conclusion
You now have a working WireGuard VPN server on Debian 13 with a connected Linux client, IP forwarding, NAT masquerade, and persistent systemd management.
Compared to OpenVPN, the entire setup took two config files and a handful of commands, and the tunnel itself came up in under a second once both sides had each other’s public keys.
To go one step further right now, add a second client with a fresh key pair and a unique IP like 10.0.0.3, confirm it connects independently, then remove it by deleting its [Peer] block and reloading the server config.
Have you migrated from OpenVPN to WireGuard recently, or are you setting up a VPN for the first time? What does your network topology look like? Tell us in the comments below.