Periodically new devices and technology coming out and it’s important to keep our Linux system kernel up-to-date if we want to get the most of out it.
Moreover, updating the system kernel will allow us to take advantage of new kernel functions, and also it helps us to protect ourselves from vulnerabilities that have been found in earlier versions.
Ready to update your kernel on Ubuntu and Debian or one of their derivatives such as Linux Mint? If so, keep reading!
Step 1: Check Installed Kernel Version
To find the current version of the installed kernel on our system we can do:
uname -sr
The following shows the output of the above command in a Ubuntu 24.04 server:
Linux 6.8.0-52-generic
Step 2: Upgrading Kernel in Ubuntu Server
To upgrade the kernel in Ubuntu, go to http://kernel.ubuntu.com/~kernel-ppa/mainline/ and choose the desired version (Kernel 6.13.4 is the latest at the time of writing) from the list by clicking on it.
Next, download the .deb files for your system architecture using the wget command.
wget https://kernel.ubuntu.com/mainline/v6.13/amd64/linux-headers-6.13.0-061300-generic_6.13.0-061300.202501302155_amd64.deb
wget https://kernel.ubuntu.com/mainline/v6.13/amd64/linux-headers-6.13.0-061300_6.13.0-061300.202501302155_all.deb
wget https://kernel.ubuntu.com/mainline/v6.13/amd64/linux-image-unsigned-6.13.0-061300-generic_6.13.0-061300.202501302155_amd64.deb
wget https://kernel.ubuntu.com/mainline/v6.13/amd64/linux-modules-6.13.0-061300-generic_6.13.0-061300.202501302155_amd64.deb
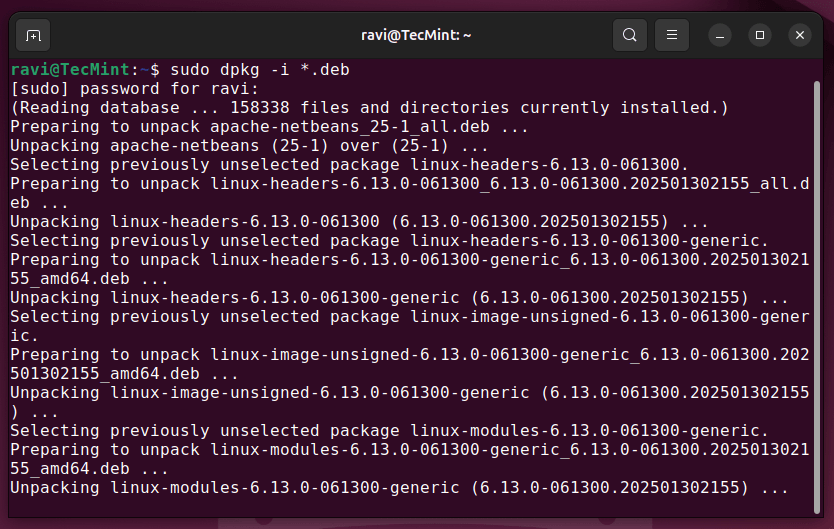
Once you’ve downloaded all the above kernel files, now install them using the dpkg package manager, which will install all downloaded .deb files at once.
sudo dpkg -i *.deb
Once the installation is complete, update the GRUB bootloader and reboot your machine to apply changes.
sudo update-grub
sudo reboot
Once your system restarts, check if the new kernel is active.
uname -sr
You should see 6.13.4 or a similar version number, confirming that the installation was successful.

You are now using a much more recent kernel version than the one installed by default with Ubuntu.
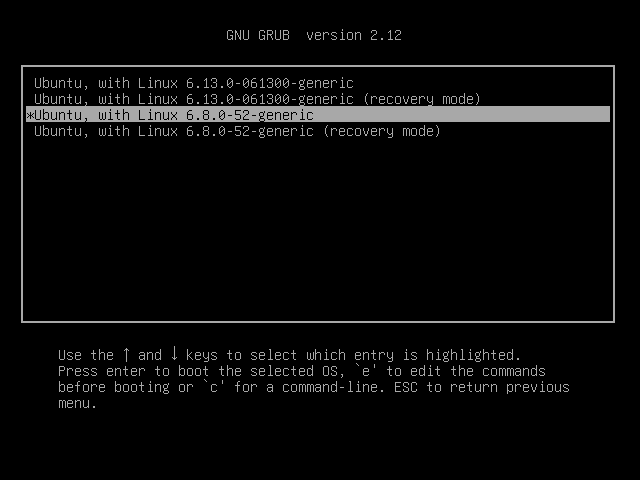
How to Boot into the Old Kernel (If Needed)
If the new kernel causes issues, you can boot into the previous version:
- Restart your system and hold the
Shiftkey (or pressEsc) during boot to access the GRUB menu. - Go to “Advanced options for Ubuntu“.
- Select your previous kernel version and press
Enter.
Once you boot into the old kernel, you can remove the new one if needed.
How to Remove Kernel 6.13.4 (If Needed)
If the new kernel is causing problems and you want to uninstall it, run.
sudo apt remove --purge linux-headers-6.13.0-061300 linux-image-unsigned-6.13.0-061300-generic linux-modules-6.13.0-061300-generic
Then, update GRUB again.
sudo update-grub
Finally, reboot your system.
sudo reboot
Summary
In this article, we’ve shown how to easily upgrade the Linux kernel on the Ubuntu system. There is yet another procedure that we haven’t shown here as it requires compiling the kernel from the source, which is not recommended on production Linux systems.
If you’re still interested in compiling the kernel as a learning experience, you will get the instructions on how to do it on the Kernel Newbies page.
As always, feel free to use the form below if you have any questions or comments about this article.